Usar VNET con una jail usando iocage
klara Systems. Virtualise your network on FreeBSD with VNET
iocage 1.2 documentation
Las pilas de red virtual VNET de FreeBSD, una potente tecnología de aislamiento de pila de red que otorga superpoderes a las cárceles de FreeBSD.
iocage es un administrador de cárceles (jails) que combina algunas de las características y tecnologiías de FreeBSD, iocage requiere ZFS para funcionar. Utiliza archivos de configuración almacenados con cada cárcel individual. Cuando iocage inicia, lee sus propios archivos de configuración y activa jail para crear e iniciar todas las cárceles que ha marcado para el inicio automático.
Las cárceles configuradas en jail.conf no entran en conflicto con las adminstradas por iocage. Ambos sistemas funcionan de forma independiente.
La gestión de hosts Unix se hace a través de sshd. Cada cárcel tendrá su propia IP.
Las reglas de TCP/IP dicen que solo un proceso puede escuchar en una combinación de dirección IP y puerto a la vez. SSH por defecto se conecta al puerto 22 en todas las direcciones IP en un huésped. Los host usan el puerto 22, las cárceles usan el puerto 23.
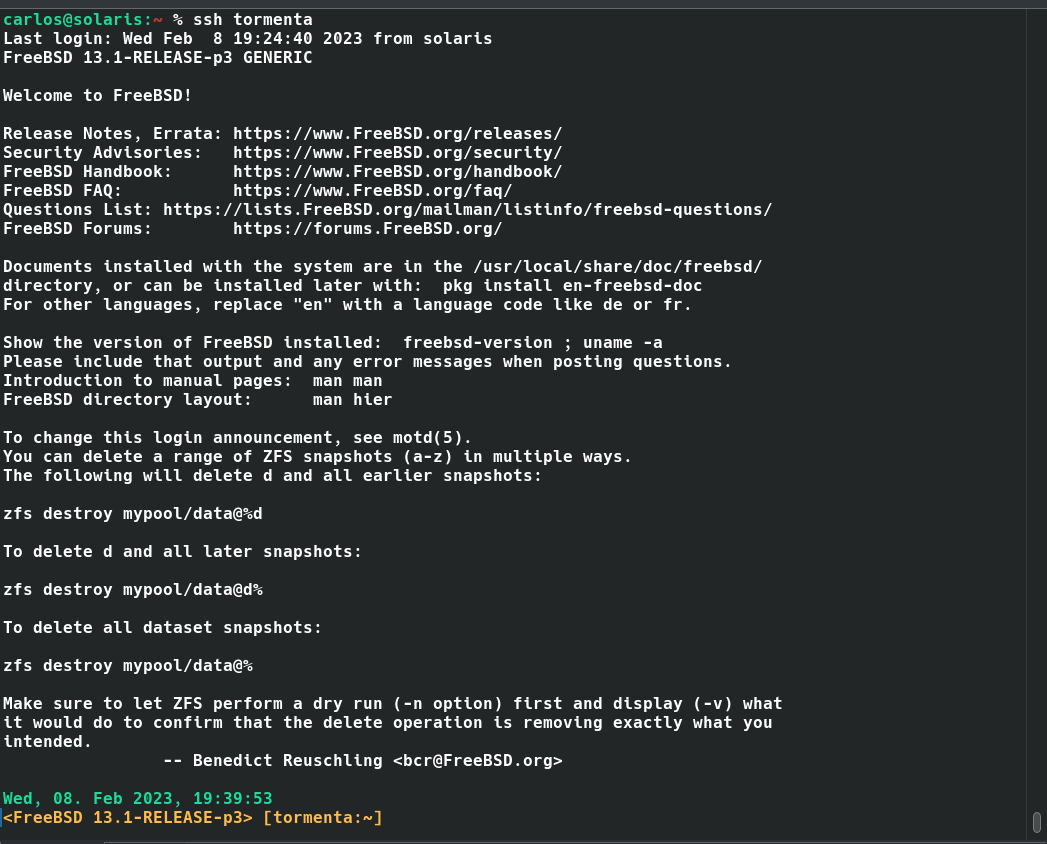
Entrar al host (tormenta) vía SSH
ssh carlos@tormenta
Restringir la dirección IP de escucha del host
ListenAddress 192.168.88.160
Reiniciar el servicio sshd
service sshd restart
El demonio ntpd escucha en todas las direcciones IP posible. Las cárceles toman su tiempo del anfitrión.
Instalar iocage
pkg install py39-iocage
Dependencias de iocage
 pkg search -d py39-iocage
py39-iocage-1.2_10
Comment        : FreeBSD jail manager written in Python3
Depends on     :
        py39-requests-2.28.1_1
        py39-texttable-1.6.7
        ca_root_nss-3.87
        py39-netifaces-0.11.0
        py39-tqdm-4.64.1
        python39-3.9.16
        py39-dnspython-2.2.1_1,1
        rcs57-5.7
        py39-typing-extensions-4.4.0
        py39-setuptools-63.1.0
        py39-libzfs-1.1.2022081600
        py39-jsonschema-4.16.0
        py39-gitpython-3.1.30
        py39-coloredlogs-15.0.1
        py39-click-8.1.3
        git-2.39.1
Montar el sistema de ficheros de descriptores de ficheros
mount -t fdescfs null/dev/fd
Agregamos esta entrada a /etc/fstab para hacerlo permanente
fdesc /dev/fd fdescfs rw 0 0
uname -a
FreeBSD tormenta 13.1-RELEASE-p3 FreeBSD 13.1-RELEASE-p3 GENERIC amd64
Comprobar el nombre del zpool
 zpool list
NAME    SIZE  ALLOC   FREE  CKPOINT  EXPANDSZ   FRAG    CAP  DEDUP    HEALTH  ALTROOT
zroot   448G  79.3G   369G        -         -     1%    17%  1.00x    ONLINE  -
Activar el zpool
 iocage activate zroot
ZFS pool 'zroot' successfully activated.
Descargar la versión de FreeBSD que será la base de nuestros jails
 iocage fetch

Press [Enter] to fetch the default selection: (13.1)
ENTER
Creación de una Jail con VNET activada
FreeBSD 13.1 habilita la compatibilidad con VNET de forma predeterminada, lo que otorga a cada cárcel su propia pila de red y facilita el encarcelamiento de aplicaciones individuales utilizando iocage.
Dirección IP estática del servidor tormenta y router por defecto /etc/rc.conf
...
ifconfig_re0="inet 192.168.88.160 netmask 255.255.255.0"
defaultrouter="192.168.88.1"
...
Archivo revolv.conf
cat /etc/resolv.conf
# Generated by resolvconf
nameserver 192.168.88.200
interface Ethernet
 ifconfig
re0: flags=8943<UP,BROADCAST,RUNNING,PROMISC,SIMPLEX,MULTICAST> metric 0 mtu 1500
        options=82099<RXCSUM,VLAN_MTU,VLAN_HWTAGGING,VLAN_HWCSUM,WOL_MAGIC,LINKSTATE>
        ether 88:ae:dd:0c:a5:c6
        inet 192.168.88.160 netmask 0xffffff00 broadcast 192.168.88.255

media: Ethernet autoselect (1000baseT <full-duplex,master>)
        status: active
...
Habilitar iocage
sysrc iocage_enable=YES
Crear un bridge
# VNET iocage
cloned_interfaces="bridge0"
ifconfig_bridge0="addm re0 up"
Agregue estos parámetros ajustables a /etc/sysctl.conf
net.inet.ip.forwarding=1       # Enable IP forwarding between interfaces
net.link.bridge.pfil_onlyip=0  # Only pass IP packets when pfil is enabled
net.link.bridge.pfil_bridge=0  # Packet filter on the bridge interface
net.link.bridge.pfil_member=0  # Packet filter on the member interface
Crear una jail llamada vikingo con VNET activada, una direccón IP estática (192.168.88.254) defaultrouter 192.168.88.1
bpf="yes"         # Alternar el inicio de la jaula con los dispositivos Berkely
                    Packet Filter habilitados
-n "vikingo"      # Nombre de la jail
-r                # jail basada en 13.1-RELEASE FreeBSD
allow_raw_sockets # Permitir ping
vnet="on"         # Usar VNET
boot="on"         # Inicar jail al arranque
defaultrouter="192.168.88.1" # Router por defecto
ip4_addr="192.168.88.250/24 # Dirección IP fija de la jail
Creación de la jail
 iocage create -n "vikingo" -r 13.1-RELEASE vnet="on" bpf="yes" \
allow_raw_sockets="1" boot="on" defaultrouter="192.168.88.1" \
ip4_addr="192.168.88.254/24"
vikingo successfully created!
Al inicio de una cárcel, el sistema copia automáticamente /etc/resolv.conf del host a la cárcel. Si la información no es correcta, puede utilizar la propiedad resolver de iocage para actualizarla.
 iocage set resolver="nameserver 192.168.88.200" vikingo
resolver: /etc/resolv.conf -> nameserver 192.168.88.200
Comprobar ping desde otra máquina en la red
solaris:~ % ping -c 2 192.168.88.254
PING 192.168.88.254 (192.168.88.254): 56 data bytes
64 bytes from 192.168.88.254: icmp_seq=0 ttl=64 time=0.546 ms
64 bytes from 192.168.88.254: icmp_seq=1 ttl=64 time=0.314 ms

--- 192.168.88.254 ping statistics ---
2 packets transmitted, 2 packets received, 0.0% packet loss
round-trip min/avg/max/stddev = 0.314/0.430/0.546/0.116 ms
Visualizar las cárceles
# iocage list
+-----+----------+-------+--------------+-------------------+
| JID |   NAME   | STATE |   RELEASE    |        IP4        |
+=====+==========+=======+==============+===================+
+-----+----------+-------+--------------+-------------------+
| 1   | vikingo  | up    | 13.1-RELEASE | 192.168.88.254/24 |
+-----+----------+-------+--------------+-------------------+
Para acceder a la consola de una jail
iocage console jailnombre
La jail no ve la red del host
exec - Iniciar comando dentro de la jail
iocage exec vikingo ifconfig

 lo0: flags=8049<UP,LOOPBACK,RUNNING,MULTICAST> metric 0 mtu 16384
        options=680003<RXCSUM,TXCSUM,LINKSTATE,RXCSUM_IPV6,TXCSUM_IPV6>
        inet6 ::1 prefixlen 128
        inet6 fe80::1%lo0 prefixlen 64 scopeid 0x1
        inet 127.0.0.1 netmask 0xff000000
        groups: lo
        nd6 options=21<PERFORMNUD,AUTO_LINKLOCAL>
epair0b: flags=8863<UP,BROADCAST,RUNNING,SIMPLEX,MULTICAST> metric 0 mtu 1500
        options=8<VLAN_MTU>
        ether 88:ae:dd:ff:a6:c2
        hwaddr 02:3f:a6:be:0e:0b
        inet 192.168.88.254 netmask 0xffffff00 broadcast 192.168.88.255
        inet6 fe80::8aae:ddff:feff:a6c2%epair0b prefixlen 64 scopeid 0x2
        groups: epair
        media: Ethernet 10Gbase-T (10Gbase-T <full-duplex>)
        status: active
        nd6 options=21<PERFORMNUD,AUTO_LINKLOCAL>
interfaces en el host
 ifconfig
re0: flags=8943<UP,BROADCAST,RUNNING,PROMISC,SIMPLEX,MULTICAST> metric 0 mtu 1500
        options=8209b<RXCSUM,TXCSUM,VLAN_MTU,VLAN_HWTAGGING,VLAN_HWCSUM,WOL_MAGIC,LINKSTATE>
        ether 88:ae:dd:0c:a5:c6
        inet 192.168.88.160 netmask 0xffffff00 broadcast 192.168.88.255
        inet 192.168.88.210 netmask 0xffffff00 broadcast 192.168.88.255
        media: Ethernet autoselect (1000baseT <full-duplex,master>)
        status: active
        nd6 options=29<PERFORMNUD,IFDISABLED,AUTO_LINKLOCAL>
lo0: flags=8049<UP,LOOPBACK,RUNNING,MULTICAST> metric 0 mtu 16384
        options=680003<RXCSUM,TXCSUM,LINKSTATE,RXCSUM_IPV6,TXCSUM_IPV6>
        inet6 ::1 prefixlen 128
        inet6 fe80::1%lo0 prefixlen 64 scopeid 0x2
        inet 127.0.0.1 netmask 0xff000000
        groups: lo
        nd6 options=21<PERFORMNUD,AUTO_LINKLOCAL>
vnet0.5: flags=8862<BROADCAST,RUNNING,SIMPLEX,MULTICAST> metric 0 mtu 1500
        description: associated with jail: vikingo as nic: epair0b
        options=8<VLAN_MTU>
        ether 88:ae:dd:ff:a6:c1
        hwaddr 02:35:3d:4b:cb:0a
        groups: epair
        media: Ethernet 10Gbase-T (10Gbase-T <full-duplex>)
        status: active
        nd6 options=29<PERFORMNUD,IFDISABLED,AUTO_LINKLOCAL>
bridge0: flags=8843<UP,BROADCAST,RUNNING,SIMPLEX,MULTICAST> metric 0 mtu 1500
        ether 58:9c:fc:10:ff:ba
        id 00:00:00:00:00:00 priority 32768 hellotime 2 fwddelay 15
        maxage 20 holdcnt 6 proto rstp maxaddr 2000 timeout 1200
        root id 00:00:00:00:00:00 priority 32768 ifcost 0 port 0
        member: re0 flags=143<LEARNING,DISCOVER,AUTOEDGE,AUTOPTP>
                ifmaxaddr 0 port 1 priority 128 path cost 20000
        groups: bridge
        nd6 options=9<PERFORMNUD,IFDISABLED>
Python3 está instalado en el host y como nuestro jail no aísla el sistema de archivos, todo el software instalado también está disponible para el jail podemos usar el servidor http integrado en python3 para mostrar un servicio de red simple que se ejecuta dentro de la cárcel.
 iocage exec vikingo sh -c "cd /root; python3 -m http.server"
Serving HTTP on :: port 8000 (http://[::]:8000/) ...
::ffff:192.168.88.51 - - [30/Jan/2023 14:56:29] "GET / HTTP/1.1" 200 -
Un navegador web en una máquina host puede apuntar a 192.168.88.254:8000 y podemos navegar por la estructura del árbol fuente de FreeBSD que vive en /root de la jail
http://192.168.88.254:8000

Entramos en la jail vikingo
iocage console vikingo
Vamos a crear el directorio /usr/local/www
mkdir /usr/local/www
Y dentro del directorio www el archivo index.html
<html><body><p><em>vikingo: Lunes 30 enero 16:47 PDT 2023</p></em></body></html>
Salimos de la jaula tecleando exit y usamos el servidor http integrado en python para mostrar index.html en el navegador
tormenta: # iocage exec vikingo sh -c "cd /usr/local/www; python3 -m http.server"
Serving HTTP on :: port 8000 (http://[::]:8000/) ...
Desde otra máquina de la red
http://192.168.8.26.254:8000

# iocage exec vikingo sh -c "cd /usr/local/www; python3 -m http.server"
Serving HTTP on :: port 8000 (http://[::]:8000/) ...
::ffff:192.168.88.51 - - [30/Ene/2023 19:10:08] "GET / HTTP/1.1" 304 -
El archivo config.json creado automáticamente por iocage de la jail
 # cat /iocage/jails/vikingo/config.json
{
    "allow_raw_sockets": 1,
    "boot": 1,
    "bpf": 1,
    "cloned_release": "13.1-RELEASE",
    "defaultrouter": "192.168.88.1",
    "host_hostname": "vikingo",
    "host_hostuuid": "vikingo",
    "ip4_addr": "192.168.88.254/24",
    "jail_zfs_dataset": "iocage/jails/vikingo/data",
    "last_started": "2023-01-28 21:04:54",
    "release": "13.1-RELEASE-p5",
    "resolver": "nameserver 192.168.88.200",
    "vnet": 1,
    "vnet0_mac": "88aeddffa6c1 88aeddffa6c2"
}
Entrar en la jaula
iocage console vikingo
Last login: Wed Feb  8 18:49:10 on pts/1
FreeBSD 13.1-RELEASE-p3 GENERIC

Welcome to FreeBSD!

Release Notes, Errata: https://www.FreeBSD.org/releases/
Security Advisories:   https://www.FreeBSD.org/security/
FreeBSD Handbook:      https://www.FreeBSD.org/handbook/
FreeBSD FAQ:           https://www.FreeBSD.org/faq/
Questions List: https://lists.FreeBSD.org/mailman/listinfo/freebsd-questions/
FreeBSD Forums:        https://forums.FreeBSD.org/

Documents installed with the system are in the /usr/local/share/doc/freebsd/
directory, or can be installed later with:  pkg install en-freebsd-doc
For other languages, replace "en" with a language code like de or fr.

Show the version of FreeBSD installed:  freebsd-version ; uname -a
Please include that output and any error messages when posting questions.
Introduction to manual pages:  man man
FreeBSD directory layout:      man hier

To change this login announcement, see motd(5).
root@vikingo:~ #
Instalar wget
# pkg install wget
The package management tool is not yet installed on your system.
Do you want to fetch and install it now? [y/N]: y
Bootstrapping pkg from pkg+http://pkg.FreeBSD.org/FreeBSD:13:amd64/quarterly, please wait...
Verifying signature with trusted certificate pkg.freebsd.org.2013102301... done
[vikingo] Installing pkg-1.19.0...
[vikingo] Extracting pkg-1.19.0: 100%
Updating FreeBSD repository catalogue...
[vikingo] Fetching meta.conf: 100%    163 B   0.2kB/s    00:01
[vikingo] Fetching packagesite.pkg: 100%    6 MiB   1.1MB/s    00:06
Processing entries: 100%
FreeBSD repository update completed. 32411 packages processed.
All repositories are up to date.
Updating database digests format: 100%
The following 5 package(s) will be affected (of 0 checked):

New packages to be INSTALLED:
        gettext-runtime: 0.21.1
        indexinfo: 0.3.1
        libidn2: 2.3.4
        libunistring: 1.1
        wget: 1.21.3_1

Number of packages to be installed: 5

The process will require 8 MiB more space.
2 MiB to be downloaded.

Proceed with this action? [y/N]:
Detener una jail
# iocage stop vikingo
* Stopping vikingo
  + Executing prestop OK
  + Stopping services OK
  + Removing devfs_ruleset: 1001 OK
  + Removing jail process OK
  + Executing poststop OK
Inicar jail vikingo
 iocage start vikingo
* Starting vikingo
  + Started OK
  + Using devfs_ruleset: 1000 (iocage generated default)
  + Configuring VNET OK
  + Using IP options: vnet
  + Starting services OK
  + Executing poststart OK
Obtener el hostid de una jail
 iocage get hostid vikingo
1867b930-d81e-6f28-017a-88aedd0ca5c6
Destruir una jail
-f Destruye la jaula sin advertencias o intervención del usuario
iocage destroy nombrejail -f
Reiniciar jail
 iocage restart vikingo
* Stopping vikingo
  + Executing prestop OK
  + Stopping services OK
  + Tearing down VNET OK
  + Removing devfs_ruleset: 1000 OK
  + Removing jail process OK
  + Executing poststop OK
* Starting vikingo
  + Started OK
  + Using devfs_ruleset: 1000 (iocage generated default)
  + Configuring VNET OK
  + Using IP options: vnet
  + Starting services OK
  + Executing poststart OK
Gestión de snapshots
Una de las funcionalidades más interesantes son los snapshots. Se crean ejecutando el siguiente comando
 iocage snapshot -n snap_vikingo00 vikingo
Snapshot: zroot/iocage/jails/vikingo@snap_vikingo00 created.
Ver los snapshots de una jail
 iocage snaplist vikingo
+---------------------+-----------------------+-------+------+
|        NAME         |        CREATED        | RSIZE | USED |
+=====================+=======================+=======+======+
| snap_vikingo00      | Tue Jan 31  7:41 2023 | 108K  | 0B   |
+---------------------+-----------------------+-------+------+
| snap_vikingo00/root | Tue Jan 31  7:41 2023 | 1.64G | 0B   |
+---------------------+-----------------------+-------+------+
El primer snapshot contiene el directorio de configuración de la jail (config.json fstab). El segundo snapshot de la raiz de la jail
Revertir la jail
Antes se detiene la jail
iocage stop vikingo
Revertir el conjunto de datos a una instantánea
iocage rollback -n snap_vikingo00 vikingo
Dump snapshot
Crear snapshot de la carcel con iocage
 iocage snapshot -n snap00_vikingo vikingo
Snapshot: zroot/iocage/jails/vikingo@snap00_vikingo created.
Listar snapshots
iocage snaplist vikingo
 iocage snaplist vikingo
+---------------------+-----------------------+-------+------+
|        NAME         |        CREATED        | RSIZE | USED |
+=====================+=======================+=======+======+
| snap00_vikingo      | Tue Jan 31  9:35 2023 | 116K  | 0B   |
+---------------------+-----------------------+-------+------+
| snap00_vikingo/root | Tue Jan 31  9:35 2023 | 1.47G | 0B   |
+---------------------+-----------------------+-------+------+
Visualizar desde ZFS
zfs list -t snapshot| grep vikingo
zroot/iocage/jails/vikingo@snap00_vikingo        0B      -      116K  -
zroot/iocage/jails/vikingo/root@snap00_vikingo   0B      -     1.47G  -
zroot/iocage/releases/13.1-RELEASE/root@vikingo  0B      -     1.46G  -
Tenemos dos snapshots, nos interesa el del sistema de ficheros raiz
Dump snapshot a un fichero
zfs send zroot/iocage/jails/vikingo/root@snap00_vikingo > /root/vikingo.raw
Es recomendable hacer copias los ficheros de configuracion
 cp /iocage/jails/vikingo/config.json /root/vikingo
 cp /iocage/jails/vikingo/fstab /root/vikingo
Destruir el snapshot
 iocage snapremove -n snap00_vikingo vikingo
Snapshot: zroot/iocage/jails/vikingo@snap00_vikingo destroyed
Comprobar
 zfs list -t snapshot | grep vikingo
zroot/iocage/releases/13.1-RELEASE/root@vikingo   0B   -     1.46G  -
Restaurar el dataset ZFS
 zfs recv -dvu zroot/iocage/jails/vikingo < /root/vikingo/vikingo.raw
receiving full stream of zroot/iocage/jails/vikingo/root@snap01_vikingo_310123 \
into zroot/iocage/jails/vikingo/iocage/jails/vikingo/root@snap01_vikingo_310123
received 2.74G stream in 5 seconds (561M/sec)

