Páginas

Mostrando entradas con la etiqueta Ethernet. Mostrar todas las entradas

lunes, 6 de abril de 2026

Configuración de LAGG failover en FreeBSD 14.4

LAGG failover en FreeBSD 14.4 em0 (primaria) y wlan0 (respaldo via iwm0)

Fuente:


https://www.ccammack.com/posts/configure-a-wifi-client-on-freebsd
https://wiki.freebsd.org/Devd
https://headthirst.com/freebsd-suspend.html
https://forums.freebsd.org/threads/freebsd-command-line-wifi-manager.89090/
https://www.dwarmstrong.org/freebsd-network-laptop/
https://libreboot.org/docs/bsd/suspend-resume-speedup.html
https://forums.freebsd.org/threads/freebsd-command-line-wifi-manager.89090/
https://forums.freebsd.org/threads/wifi-stops-working-after-suspend-resume.85889/
https://www.reddit.com/r/voidlinux/comments/1lfxurz/wifi_disappears_after_waking_from_suspend_i

Nombres de los dispositivos 802.11 disponibles

sysctl net.wlan.devices
net.wlan.devices: iwm0

Tomando como ejemplo mi computadora portátil (Dell Latitude 7390), la interfaz Ethernet em0 funcionará como puerto maestro y la interfaz inalámbrica wlan0 será el dispositivo de respaldo. Combino las dos interfaces en una interfaz virtual sobrescribiendo la dirección MAC de la interfaz Ethernet con la dirección MAC de la interfaz inalámbrica.

Determinar la dirección MAC de la interfaz inalámbrica

ifconfig wlan0 | grep ether
	ether 18:56:80:f8:98:e6

Cambiar la dirección MAC de la interfaz Ethernet para que coincidan

ifconfig em0 ether 18:56:80:f8:98:e6	

/etc/rc.conf

...
ifconfig_em0="ether 18:56:80:f8:98:e6"
wlans_iwm0="wlan0"
ifconfig_wlan0="WPA"
cloned_interfaces="lagg0"
ifconfig_lagg0="laggproto failover laggport em0 laggport wlan0 SYNCDHCP"
create_args_wlan0="country ES"
defaultrouter="192.168.88.1"
defaultroute_delay="10"
background_dhclient_lagg0="YES"
... 
Archivo /etc/wpa_supplicant
/etc/wpa_supplicant.conf
ctrl_interface=/var/run/wpa_supplicant
eapol_version=2
fast_reauth=1

network={
	ssid="MikroTik-39F9C0"	
        psk=755862a5b1a4ef59e2e62590677a75f5317193637a8629dccb18c40e8634a68e
}

Reiniciar

Estado general del LAGG

ifconfig lagg0
lagg0: flags=1008843 UP,BROADCAST,RUNNING,SIMPLEX,MULTICAST,LOWER_UP metric 0 mtu 1500
	options=0
	ether 18:56:80:f8:98:e6
	hwaddr 00:00:00:00:00:00
	inet 192.168.88.50 netmask 0xffffff00 broadcast 192.168.88.255
	laggproto failover lagghash l2,l3,l4
	laggport: em0 flags=1 MASTER
	laggport: wlan0 flags=4 ACTIVE
	groups: lagg
	media: Ethernet autoselect
	status: active
	nd6 options=29 PERFORMNUD,IFDISABLED,AUTO_LINKLOCAL

Ver puerto activo

ifconfig lagg0 | grep -E "laggport|status"
	laggport: em0 flags=1 MASTER 
	laggport: wlan0 flags=4 ACTIVE
	status: active

Estadísticas en detalle

sysctl net.link.lagg
net.link.lagg.lacp.default_strict_mode: 1
net.link.lagg.lacp.debug: 0
net.link.lagg.default_flowid_shift: 16
net.link.lagg.default_use_numa: 1
net.link.lagg.default_use_flowid: 0
net.link.lagg.failover_rx_all: 0

En /etc/rc.conf em0 no debe tener IP propia, es gestionado por lagg0 wlan0 no debe tener DHCP propio cuando está bajo lagg0; el DHCP lo gestiona lagg0. El failover es automático, al detectar pérdida de carrier en em0, el tráfico pasa a wlan0 sin intervención manual.

Sin conexión a Internet después de salir de hibernación

Al salir de hibernación, devd no recrea lagg0 de forma automática. La solución es un script de resume que se ejecute al despertar.

Crear el script de resume-network.sh

/usr/local/sbin/resume-network.sh

#!/bin/sh
sleep 3

# Destruir interfaces
ifconfig lagg0 destroy 2>/dev/null
ifconfig wlan0 destroy 2>/dev/null

# Recrear wlan0 sin country (lo hereda de rc.conf al crear)
ifconfig wlan0 create wlandev iwm0
ifconfig wlan0 country ES 2>/dev/null

# Recrear lagg0
ifconfig lagg0 create
ifconfig lagg0 laggproto failover
ifconfig lagg0 laggport em0
ifconfig lagg0 laggport wlan0
ifconfig lagg0 up

# Arrancar wpa_supplicant
wpa_supplicant -B -i wlan0 -c /etc/wpa_supplicant.conf

# Esperar asociacion (max 30s)
i=0
while [ $i -lt 30 ]; do
    status=$(ifconfig wlan0 | grep "status:" | awk '{print $2}')
    [ "$status" = "associated" ] && break
    sleep 1
    i=$((i + 1))
done

logger "resume-network: wlan0 status=$status tras ${i}s"

# Matar dhclient previo si existe
pkill -F /var/run/dhclient/dhclient.lagg0.pid 2>/dev/null
sleep 1

# Obtener IP
dhclient lagg0

# Ruta por defecto si dhclient no la puso
sleep 2
netstat -rn | grep -q "^default" || route add default 192.168.88.1

logger "resume-network: completado"

Aumentar timeout de dhclient

vim /etc/dhclient.conf
interface "lagg0" {
    timeout 60;
    retry 10;
}

Configurar devd para se ejecute al despertar

vim /etc/devd/resume-network.conf
notify 100 {
    match "system"      "ACPI";
    match "subsystem"   "Resume";
    action "/usr/local/sbin/resume-network.sh &";
};

Reinicar devd

sudo service devd restart

Comprobar que devd capta el evento revisando tras salir de hibernación

tail -5 /var/log/messages
Apr  5 16:11:50 solaris dhclient[13642]: New IP Address (lagg0): 192.168.88.50
Apr  5 16:11:50 solaris dhclient[13646]: New Subnet Mask (lagg0): 255.255.255.0
Apr  5 16:11:50 solaris dhclient[13650]: New Broadcast Address (lagg0): 192.168.88.255
Apr  5 16:11:50 solaris dhclient[13654]: New Routers (lagg0): 192.168.88.1
Apr  5 16:11:51 solaris root[13671]: resume-network: completado

Al hibernar, FreeBSD destruye las interfaces clonadas (lagg0) y en algunos casos también wlan0. Al despertar, rc.conf no se reprocesa. devd es el mecanismo correcto para reaccionar a eventos ACPI como Resume.

El sleep 3 inicial es importante porque iwm0 necesita unos segundos para que el firmware del adaptador WiFi Intel esté operativo tras el resume.

Ver si devd captó el evento Resume

grep -E "Resume|resume-network" /var/log/messages | tail -5

Apr  5 15:48:07 solaris carlos[12362]: resume-network: wlan0 status=associated tras 3s
Apr  5 15:48:09 solaris carlos[12527]: resume-network: completado
Apr  5 16:11:39 solaris kernel: rtsx0: Resume
Apr  5 16:11:49 solaris root[13506]: resume-network: wlan0 status=associated tras 3s
Apr  5 16:11:51 solaris root[13671]: resume-network: completado

Comprobar que dhclient obtuvo IP

Apr  5 16:11:50 solaris dhclient[27343]: My address (192.168.88.50) was deleted, dhclient exiting
Apr  5 16:11:51 solaris dhclient[28339]: dhclient already running, pid: 28314.
Apr  5 16:11:51 solaris dhclient[28339]: exiting.
Apr  5 16:11:52 solaris dhclient[28317]: connection closed
Apr  5 16:11:52 solaris dhclient[28317]: exiting.
Apr  5 16:11:54 solaris dhclient[28659]: New IP Address (lagg0): 192.168.88.50
Apr  5 16:11:54 solaris dhclient[28663]: New Subnet Mask (lagg0): 255.255.255.0
Apr  5 16:11:55 solaris dhclient[28667]: New Broadcast Address (lagg0): 192.168.88.255
Apr  5 16:11:55 solaris dhclient[28671]: New Routers (lagg0): 192.168.88.1
FreeBSD es genial!.

lunes, 20 de febrero de 2023

Gestión de Jails con Bastille FreeBSD

Jails con Bastille FreeBSD

https://docs.freebsd.org/en/books/handbook/jails/ https://bastille.readthedocs.io/en/latest/

1.- Creación de la Jail www con Bastille

2.- Instalar Apache MySQL PHP

3.- Instalar Wordpress. Activar rdr en Firewall PF

Información sobre el sistema

% uname -mrs
FreeBSD 13.1-RELEASE-p6 amd64

La virtualización es algo así como un entorno cliente-servidor. El hardware y su instancia central del sistema operativo es el host, mientras que los clientes son instancias virtualizadas del sistema operativo. Una jail contiene una zona de usuario completa del sistema operativo que se ejecuta sobre un sistema FreeBSD existente. La jail no tiene su propio kernel, en cambio, se ejecuta en una porción restringida del kernel del host.

Un sistema enjaulado sólo puede acceder a una parte limitada del sistema de archivos y no puede ver procesos fuera de la jaula. A cada jaula se le asigna una dirección IP dedicada, y la jaula sólo puede ver el tráfico a esa IP en particular. Cada jaula necesita un directorio raíz dedicado

La cuenta root en una jaula controla completamente esa jaula pero no tiene acceso a nada más allá de la jaula, está confinado. El usuario puede instalar el software que desee sin interferir con el sistema anfitrión ni con otras jaulas.

Bastille es un gestor de jails escrito en Bourne Shell.

Soporta ZFS
VNET
Automatización de jails por medio de templates
Control de recursos (rctl)
Firewall dinámico - redirección dinámica de puertos, etc.
La red interna de la jail hará nat a través de PF

El comando ping está deshabilitado dentro de los contenedores, porque el acceso sin procesar al socket es un agujero de seguridad. En su lugar, se puede instalar y probar con wget.

 pkg install bastille

Habilitar las opciones para utilizar ZFS en bastille

 sysrc -f /usr/local/etc/bastille/bastille.conf bastille_zfs_enable=YES
 sysrc -f /usr/local/etc/bastille/bastille.conf bastille_zfs_zpool=zroot

Activar bastille

 sysrc bastille_enable=YES

Iniciar bastille

service bastille start

Descargar los ficheros base de la última versión de FreeBSD que vamos a utilizar y aplicar parches de seguridad.

# bastille bootstrap 13.1-RELEASE update

Bucle invertido bastille0

loopback (bastille0)

Crear una interfaz loopback clonada (bastille0) y asignar direcciones privadas (rfc1918) a todos las jails en esa interfaz. Se puede usar cualquier dirección dentro de ese rango porque hemos creado nuestra propia red privada.

Desde el sistema host el cortafuegos (PF), permite y deniega tráfico. Con esta configuración los contenedores se mantienen fuera de la red, hasta que se permita el acceso.

El NAT del cortafuegos del sistema saca el tráfico de los contenedores y puede redirigir selectivamente el tráfico a los contenedores en función de los puertos de conexión (es decir, 80, 443, etc.)

Crear la interfaz loopback

 sysrc cloned_interfaces+=lo1
 sysrc ifconfig_lo1_name="bastille0"

Aplicar la configuración

 service netif cloneup

PF es una herramienta de manipulacion TCP/IP

Permitir conexiones SSH

$ cat /etc/pf.conf
#
ext_if="em0"

set skip on lo
set block-policy return
scrub in on $ext_if all fragment reassemble

table <jails> persist
nat on $ext_if from <jails> to any -> ($ext_if:0)
rdr-anchor "rdr/*"

block in all
pass out quick keep state
antispoof for $ext_if inet

pass in inet proto tcp from any to any port ssh flags S/SA keep state

Habilitar PF

# sysrc pf_enable=YES

Iniciar PF

 service pf start

Consultar las reglas de PF

pfctl -sr
scrub in on em0 all fragment reassemble
block return in all
pass out quick all flags S/SA keep state
block drop in on ! em0 inet from 192.168.88.0/24 to any
block drop in inet from 192.168.88.51 to any
pass in inet proto tcp from any to any port = ssh flags S/SA keep state

Crear la jail www y asignarle la dirección IP 10.10.10.2

bastille create www 13.1-RELEASE 10.10.10.2
Valid: (10.10.10.2).
...
Creating a thinjail...

Listar las jails

solaris: # bastille list
 JID             IP Address      Hostname       Path
 www             10.10.10.2      www            /usr/local/bastille/jails/www/root

Entrar en la jail www para ver su dirección IP

 bastille console www
[www]:
root@www:~ #
root@www:~ # uname -mrs
FreeBSD 13.1-RELEASE-p6 amd64 

Ejecutar ifconfig

Crear un usuario no privilegiado para Habilitar conexiones SSH desde el host

Entrar en la jail

 bastille console www
 root@www:~ # adduser
 ...
SSH Secure Shell

Salir de la jail

root@www:~ # exit
logout

Habilitar e iniciar el servicio SSH en la jail

 bastille sysrc www sshd_enable=YES
 bastille service www sshd start

Establecer el Port 23 y la ListenAddress 10.10.10.2 en el archivo de configuración /etc/ssh/sshd_config

Port 23
ListenAddress 10.10.10.2

Reiniciar el servicio

 service sshd restart

Se puede saber si el socket está a la escucha ejecutando

bastille cmd www sockstat -4

[www]:
USER     COMMAND    PID   FD PROTO  LOCAL ADDRESS         FOREIGN ADDRESS
root     sshd       55610 3  tcp4   10.10.10.2:23         *:*
[www]: 0

También podemos entrar en la jail y lanzar el comando nc localhost 23

 bastille console www
root@www:~ # nc localhost 23
SSH-2.0-OpenSSH_8.8 FreeBSD-20211221

SSH le permite generar una huella digital de clave, que es una representación mucho más corta de una clave. No puedes encriptar el tráfico o negociar con la huella dactilar. Para generar una huella de clave pública, introduzca el comando ssh-keygen -lf keyfile.pub.

root@www:~ # ssh-keygen -lf /etc/ssh/ssh_host_rsa_key.pub

Salir de la jail

root@www:~ # exit
logout

En el host agregar al archivo .ssh/config los datos de conexión

carlos@solaris:~ cat .ssh/config
Host www
    HostName 10.10.10.2
    User carlos
    Port 23
    AddressFamily inet
    BindInterface em0
    IdentityFile ~/.ssh/id_rsa

    CASignatureAlgorithms ssh-ed25519,ecdsa-sha2-nistp256,ecdsa-sha2-nistp384,ecdsa-sha2-nistp521,sk-ssh-ed25519@openssh.com,sk-ecdsa-sha2-nistp256@openssh.com,rsa-sha2-512,rsa-sha2-256

    Ciphers  chacha20-poly1305@openssh.com,aes128-ctr,aes192-ctr,aes256-ctr,aes128-gcm@openssh.com,aes256-gcm@openssh.com

    CheckHostIP yes

Entrar a la jail www a través de SSH

carlos@solaris:~/.ssh % ssh www
The authenticity of host '[10.10.10.2]:23 ([10.10.10.2]:23)' can't be established.
ED25519 key fingerprint is SHA256:KEnjnUTz7FPyq2c+ZcEzKvu+s5diszqxff+DmFJ+0sI.
No matching host key fingerprint found in DNS.
This host key is known by the following other names/addresses:
    ~/.ssh/known_hosts:45: www
Are you sure you want to continue connecting (yes/no/[fingerprint])? yes
Warning: Permanently added '[10.10.10.2]:23' (ED25519) to the list of known hosts.

Dentro de la jail www

carlos@www:~ $

Cambiar al usuario root

carlos@www:~ $ su
root@www: #

Instalar wget para comprobar que tenemos acceso a Internet

 pkg install wget
The package management tool is not yet installed on your system.
Do you want to fetch and install it now? [y/N]: y

En este punto tenemos la jail instalada y con conexion a Internet.

Detener la jail

bastille stop www

Iniciar la jail

bastille start www

[www]:
www: created

Archivos de configuracion de Bastille jails

ls /usr/local/bastille/jails/www
fstab     jail.conf root

Archivo jails.conf de bastille

# cat /usr/local/bastille/jails.conf
www {
  devfs_ruleset = 4;
  enforce_statfs = 2;
  exec.clean;
  exec.consolelog = /var/log/bastille/www_console.log;
  exec.start = '/bin/sh /etc/rc';
  exec.stop = '/bin/sh /etc/rc.shutdown';
  host.hostname = www;
  mount.devfs;
  mount.fstab = /usr/local/bastille/jails/www/fstab;
  path = /usr/local/bastille/jails/www/root;
  securelevel = 2;

  interface = bastille0;
  ip4.addr = 10.10.10.2;
  ip6 = disable;
}
FreeBSD es genial!.

martes, 31 de enero de 2023

Jails VNET iocage FreeBSD 13.1

Usar VNET con una jail usando iocage

klara Systems. Virtualise your network on FreeBSD with VNET iocage 1.2 documentation

Las pilas de red virtual VNET de FreeBSD, una potente tecnología de aislamiento de pila de red que otorga superpoderes a las cárceles de FreeBSD.

iocage es un administrador de cárceles (jails) que combina algunas de las características y tecnologiías de FreeBSD, iocage requiere ZFS para funcionar. Utiliza archivos de configuración almacenados con cada cárcel individual. Cuando iocage inicia, lee sus propios archivos de configuración y activa jail para crear e iniciar todas las cárceles que ha marcado para el inicio automático.

Las cárceles configuradas en jail.conf no entran en conflicto con las adminstradas por iocage. Ambos sistemas funcionan de forma independiente.

La gestión de hosts Unix se hace a través de sshd. Cada cárcel tendrá su propia IP.

Las reglas de TCP/IP dicen que solo un proceso puede escuchar en una combinación de dirección IP y puerto a la vez. SSH por defecto se conecta al puerto 22 en todas las direcciones IP en un huésped. Los host usan el puerto 22, las cárceles usan el puerto 23.

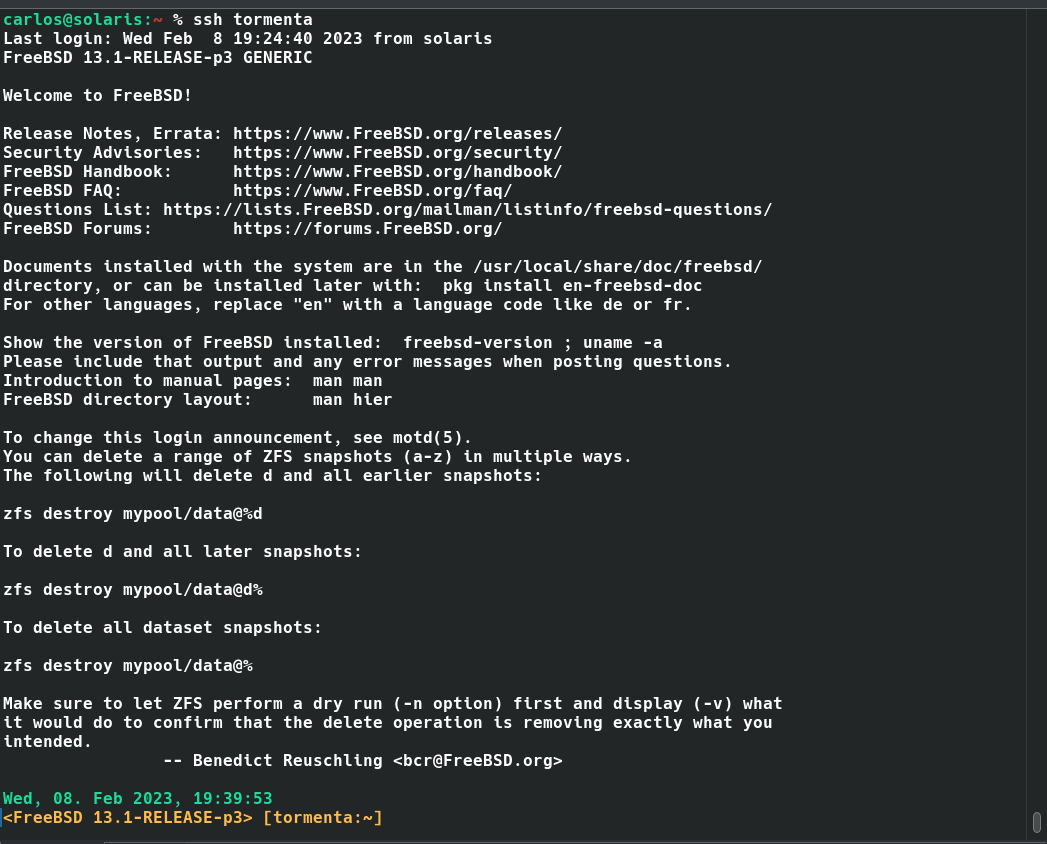
Entrar al host (tormenta) vía SSH

 ssh carlos@tormenta

Restringir la dirección IP de escucha del host

ListenAddress 192.168.88.160

Reiniciar el servicio sshd

 service sshd restart

El demonio ntpd escucha en todas las direcciones IP posible. Las cárceles toman su tiempo del anfitrión.

Instalar iocage

 pkg install py39-iocage

Dependencias de iocage

 pkg search -d py39-iocage
py39-iocage-1.2_10
Comment        : FreeBSD jail manager written in Python3
Depends on     :
        py39-requests-2.28.1_1
        py39-texttable-1.6.7
        ca_root_nss-3.87
        py39-netifaces-0.11.0
        py39-tqdm-4.64.1
        python39-3.9.16
        py39-dnspython-2.2.1_1,1
        rcs57-5.7
        py39-typing-extensions-4.4.0
        py39-setuptools-63.1.0
        py39-libzfs-1.1.2022081600
        py39-jsonschema-4.16.0
        py39-gitpython-3.1.30
        py39-coloredlogs-15.0.1
        py39-click-8.1.3
        git-2.39.1

Montar el sistema de ficheros de descriptores de ficheros

 mount -t fdescfs null/dev/fd

Agregamos esta entrada a /etc/fstab para hacerlo permanente

 fdesc  /dev/fd   fdescfs rw    0       0

uname -a

FreeBSD tormenta 13.1-RELEASE-p3 FreeBSD 13.1-RELEASE-p3 GENERIC amd64

Comprobar el nombre del zpool

 zpool list
NAME    SIZE  ALLOC   FREE  CKPOINT  EXPANDSZ   FRAG    CAP  DEDUP    HEALTH  ALTROOT
zroot   448G  79.3G   369G        -         -     1%    17%  1.00x    ONLINE  -

Activar el zpool

 iocage activate zroot
ZFS pool 'zroot' successfully activated.

Descargar la versión de FreeBSD que será la base de nuestros jails

 iocage fetch

Press [Enter] to fetch the default selection: (13.1)
ENTER

Creación de una Jail con VNET activada

FreeBSD 13.1 habilita la compatibilidad con VNET de forma predeterminada, lo que otorga a cada cárcel su propia pila de red y facilita el encarcelamiento de aplicaciones individuales utilizando iocage.

Dirección IP estática del servidor tormenta y router por defecto /etc/rc.conf

...
ifconfig_re0="inet 192.168.88.160 netmask 255.255.255.0"
defaultrouter="192.168.88.1"
...

Archivo revolv.conf

cat /etc/resolv.conf
# Generated by resolvconf
nameserver 192.168.88.200

interface Ethernet

 ifconfig
re0: flags=8943<UP,BROADCAST,RUNNING,PROMISC,SIMPLEX,MULTICAST> metric 0 mtu 1500
        options=82099<RXCSUM,VLAN_MTU,VLAN_HWTAGGING,VLAN_HWCSUM,WOL_MAGIC,LINKSTATE>
        ether 88:ae:dd:0c:a5:c6
        inet 192.168.88.160 netmask 0xffffff00 broadcast 192.168.88.255

media: Ethernet autoselect (1000baseT <full-duplex,master>)
        status: active
...

Habilitar iocage

 sysrc iocage_enable=YES

Crear un bridge

# VNET iocage
cloned_interfaces="bridge0"
ifconfig_bridge0="addm re0 up"

Agregue estos parámetros ajustables a /etc/sysctl.conf

net.inet.ip.forwarding=1       # Enable IP forwarding between interfaces
net.link.bridge.pfil_onlyip=0  # Only pass IP packets when pfil is enabled
net.link.bridge.pfil_bridge=0  # Packet filter on the bridge interface
net.link.bridge.pfil_member=0  # Packet filter on the member interface

Crear una jail llamada vikingo con VNET activada, una direccón IP estática (192.168.88.254) defaultrouter 192.168.88.1

bpf="yes"         # Alternar el inicio de la jaula con los dispositivos Berkely 
                    Packet Filter habilitados
-n "vikingo"      # Nombre de la jail
-r                # jail basada en 13.1-RELEASE FreeBSD
allow_raw_sockets # Permitir ping
vnet="on"         # Usar VNET
boot="on"         # Inicar jail al arranque
defaultrouter="192.168.88.1" # Router por defecto
ip4_addr="192.168.88.250/24 # Dirección IP fija de la jail

Creación de la jail

 iocage create -n "vikingo" -r 13.1-RELEASE vnet="on" bpf="yes" \
allow_raw_sockets="1" boot="on" defaultrouter="192.168.88.1" \
ip4_addr="192.168.88.254/24"
vikingo successfully created!

Al inicio de una cárcel, el sistema copia automáticamente /etc/resolv.conf del host a la cárcel. Si la información no es correcta, puede utilizar la propiedad resolver de iocage para actualizarla.

 iocage set resolver="nameserver 192.168.88.200" vikingo
resolver: /etc/resolv.conf -> nameserver 192.168.88.200

Comprobar ping desde otra máquina en la red

solaris:~ % ping -c 2 192.168.88.254
PING 192.168.88.254 (192.168.88.254): 56 data bytes
64 bytes from 192.168.88.254: icmp_seq=0 ttl=64 time=0.546 ms
64 bytes from 192.168.88.254: icmp_seq=1 ttl=64 time=0.314 ms

--- 192.168.88.254 ping statistics ---
2 packets transmitted, 2 packets received, 0.0% packet loss
round-trip min/avg/max/stddev = 0.314/0.430/0.546/0.116 ms

Visualizar las cárceles

# iocage list
+-----+----------+-------+--------------+-------------------+
| JID |   NAME   | STATE |   RELEASE    |        IP4        |
+=====+==========+=======+==============+===================+
+-----+----------+-------+--------------+-------------------+
| 1   | vikingo  | up    | 13.1-RELEASE | 192.168.88.254/24 |
+-----+----------+-------+--------------+-------------------+

Para acceder a la consola de una jail

 iocage console jailnombre

La jail no ve la red del host

exec - Iniciar comando dentro de la jail

iocage exec vikingo ifconfig

 lo0: flags=8049<UP,LOOPBACK,RUNNING,MULTICAST> metric 0 mtu 16384
        options=680003<RXCSUM,TXCSUM,LINKSTATE,RXCSUM_IPV6,TXCSUM_IPV6>
        inet6 ::1 prefixlen 128
        inet6 fe80::1%lo0 prefixlen 64 scopeid 0x1
        inet 127.0.0.1 netmask 0xff000000
        groups: lo
        nd6 options=21<PERFORMNUD,AUTO_LINKLOCAL>
epair0b: flags=8863<UP,BROADCAST,RUNNING,SIMPLEX,MULTICAST> metric 0 mtu 1500
        options=8<VLAN_MTU>
        ether 88:ae:dd:ff:a6:c2
        hwaddr 02:3f:a6:be:0e:0b
        inet 192.168.88.254 netmask 0xffffff00 broadcast 192.168.88.255
        inet6 fe80::8aae:ddff:feff:a6c2%epair0b prefixlen 64 scopeid 0x2
        groups: epair
        media: Ethernet 10Gbase-T (10Gbase-T <full-duplex>)
        status: active
        nd6 options=21<PERFORMNUD,AUTO_LINKLOCAL>

interfaces en el host

 ifconfig
re0: flags=8943<UP,BROADCAST,RUNNING,PROMISC,SIMPLEX,MULTICAST> metric 0 mtu 1500
        options=8209b<RXCSUM,TXCSUM,VLAN_MTU,VLAN_HWTAGGING,VLAN_HWCSUM,WOL_MAGIC,LINKSTATE>
        ether 88:ae:dd:0c:a5:c6
        inet 192.168.88.160 netmask 0xffffff00 broadcast 192.168.88.255
        inet 192.168.88.210 netmask 0xffffff00 broadcast 192.168.88.255
        media: Ethernet autoselect (1000baseT <full-duplex,master>)
        status: active
        nd6 options=29<PERFORMNUD,IFDISABLED,AUTO_LINKLOCAL>
lo0: flags=8049<UP,LOOPBACK,RUNNING,MULTICAST> metric 0 mtu 16384
        options=680003<RXCSUM,TXCSUM,LINKSTATE,RXCSUM_IPV6,TXCSUM_IPV6>
        inet6 ::1 prefixlen 128
        inet6 fe80::1%lo0 prefixlen 64 scopeid 0x2
        inet 127.0.0.1 netmask 0xff000000
        groups: lo
        nd6 options=21<PERFORMNUD,AUTO_LINKLOCAL>
vnet0.5: flags=8862<BROADCAST,RUNNING,SIMPLEX,MULTICAST> metric 0 mtu 1500
        description: associated with jail: vikingo as nic: epair0b
        options=8<VLAN_MTU>
        ether 88:ae:dd:ff:a6:c1
        hwaddr 02:35:3d:4b:cb:0a
        groups: epair
        media: Ethernet 10Gbase-T (10Gbase-T <full-duplex>)
        status: active
        nd6 options=29<PERFORMNUD,IFDISABLED,AUTO_LINKLOCAL>
bridge0: flags=8843<UP,BROADCAST,RUNNING,SIMPLEX,MULTICAST> metric 0 mtu 1500
        ether 58:9c:fc:10:ff:ba
        id 00:00:00:00:00:00 priority 32768 hellotime 2 fwddelay 15
        maxage 20 holdcnt 6 proto rstp maxaddr 2000 timeout 1200
        root id 00:00:00:00:00:00 priority 32768 ifcost 0 port 0
        member: re0 flags=143<LEARNING,DISCOVER,AUTOEDGE,AUTOPTP>
                ifmaxaddr 0 port 1 priority 128 path cost 20000
        groups: bridge
        nd6 options=9<PERFORMNUD,IFDISABLED>

Python3 está instalado en el host y como nuestro jail no aísla el sistema de archivos, todo el software instalado también está disponible para el jail podemos usar el servidor http integrado en python3 para mostrar un servicio de red simple que se ejecuta dentro de la cárcel.

 iocage exec vikingo sh -c "cd /root; python3 -m http.server"
Serving HTTP on :: port 8000 (http://[::]:8000/) ...
::ffff:192.168.88.51 - - [30/Jan/2023 14:56:29] "GET / HTTP/1.1" 200 -

Un navegador web en una máquina host puede apuntar a 192.168.88.254:8000 y podemos navegar por la estructura del árbol fuente de FreeBSD que vive en /root de la jail

http://192.168.88.254:8000

Entramos en la jail vikingo

 iocage console vikingo

Vamos a crear el directorio /usr/local/www

mkdir /usr/local/www

Y dentro del directorio www el archivo index.html

<html><body><p><em>vikingo: Lunes 30 enero 16:47 PDT 2023</p></em></body></html>

Salimos de la jaula tecleando exit y usamos el servidor http integrado en python para mostrar index.html en el navegador

tormenta: # iocage exec vikingo sh -c "cd /usr/local/www; python3 -m http.server"
Serving HTTP on :: port 8000 (http://[::]:8000/) ...

Desde otra máquina de la red

http://192.168.8.26.254:8000

# iocage exec vikingo sh -c "cd /usr/local/www; python3 -m http.server"
Serving HTTP on :: port 8000 (http://[::]:8000/) ...
::ffff:192.168.88.51 - - [30/Ene/2023 19:10:08] "GET / HTTP/1.1" 304 -

El archivo config.json creado automáticamente por iocage de la jail

 # cat /iocage/jails/vikingo/config.json
{
    "allow_raw_sockets": 1,
    "boot": 1,
    "bpf": 1,
    "cloned_release": "13.1-RELEASE",
    "defaultrouter": "192.168.88.1",
    "host_hostname": "vikingo",
    "host_hostuuid": "vikingo",
    "ip4_addr": "192.168.88.254/24",
    "jail_zfs_dataset": "iocage/jails/vikingo/data",
    "last_started": "2023-01-28 21:04:54",
    "release": "13.1-RELEASE-p5",
    "resolver": "nameserver 192.168.88.200",
    "vnet": 1,
    "vnet0_mac": "88aeddffa6c1 88aeddffa6c2"
}

Entrar en la jaula

 iocage console vikingo
Last login: Wed Feb  8 18:49:10 on pts/1
FreeBSD 13.1-RELEASE-p3 GENERIC

Welcome to FreeBSD!

Release Notes, Errata: https://www.FreeBSD.org/releases/
Security Advisories:   https://www.FreeBSD.org/security/
FreeBSD Handbook:      https://www.FreeBSD.org/handbook/
FreeBSD FAQ:           https://www.FreeBSD.org/faq/
Questions List: https://lists.FreeBSD.org/mailman/listinfo/freebsd-questions/
FreeBSD Forums:        https://forums.FreeBSD.org/

Documents installed with the system are in the /usr/local/share/doc/freebsd/
directory, or can be installed later with:  pkg install en-freebsd-doc
For other languages, replace "en" with a language code like de or fr.

Show the version of FreeBSD installed:  freebsd-version ; uname -a
Please include that output and any error messages when posting questions.
Introduction to manual pages:  man man
FreeBSD directory layout:      man hier

To change this login announcement, see motd(5).
root@vikingo:~ # 

Instalar wget

# pkg install wget
The package management tool is not yet installed on your system.
Do you want to fetch and install it now? [y/N]: y
Bootstrapping pkg from pkg+http://pkg.FreeBSD.org/FreeBSD:13:amd64/quarterly, please wait...
Verifying signature with trusted certificate pkg.freebsd.org.2013102301... done
[vikingo] Installing pkg-1.19.0...
[vikingo] Extracting pkg-1.19.0: 100%
Updating FreeBSD repository catalogue...
[vikingo] Fetching meta.conf: 100%    163 B   0.2kB/s    00:01
[vikingo] Fetching packagesite.pkg: 100%    6 MiB   1.1MB/s    00:06
Processing entries: 100%
FreeBSD repository update completed. 32411 packages processed.
All repositories are up to date.
Updating database digests format: 100%
The following 5 package(s) will be affected (of 0 checked):

New packages to be INSTALLED:
        gettext-runtime: 0.21.1
        indexinfo: 0.3.1
        libidn2: 2.3.4
        libunistring: 1.1
        wget: 1.21.3_1

Number of packages to be installed: 5

The process will require 8 MiB more space.
2 MiB to be downloaded.

Proceed with this action? [y/N]:

Detener una jail

# iocage stop vikingo
* Stopping vikingo
  + Executing prestop OK
  + Stopping services OK
  + Removing devfs_ruleset: 1001 OK
  + Removing jail process OK
  + Executing poststop OK

Inicar jail vikingo

 iocage start vikingo
* Starting vikingo
  + Started OK
  + Using devfs_ruleset: 1000 (iocage generated default)
  + Configuring VNET OK
  + Using IP options: vnet
  + Starting services OK
  + Executing poststart OK

Obtener el hostid de una jail

 iocage get hostid vikingo
1867b930-d81e-6f28-017a-88aedd0ca5c6

Destruir una jail

-f Destruye la jaula sin advertencias o intervención del usuario

 iocage destroy nombrejail -f

Reiniciar jail

 iocage restart vikingo
* Stopping vikingo
  + Executing prestop OK
  + Stopping services OK
  + Tearing down VNET OK
  + Removing devfs_ruleset: 1000 OK
  + Removing jail process OK
  + Executing poststop OK
* Starting vikingo
  + Started OK
  + Using devfs_ruleset: 1000 (iocage generated default)
  + Configuring VNET OK
  + Using IP options: vnet
  + Starting services OK
  + Executing poststart OK

Gestión de snapshots

Una de las funcionalidades más interesantes son los snapshots. Se crean ejecutando el siguiente comando

 iocage snapshot -n snap_vikingo00 vikingo
Snapshot: zroot/iocage/jails/vikingo@snap_vikingo00 created.

Ver los snapshots de una jail

 iocage snaplist vikingo
+---------------------+-----------------------+-------+------+
|        NAME         |        CREATED        | RSIZE | USED |
+=====================+=======================+=======+======+
| snap_vikingo00      | Tue Jan 31  7:41 2023 | 108K  | 0B   |
+---------------------+-----------------------+-------+------+
| snap_vikingo00/root | Tue Jan 31  7:41 2023 | 1.64G | 0B   |
+---------------------+-----------------------+-------+------+

El primer snapshot contiene el directorio de configuración de la jail (config.json fstab). El segundo snapshot de la raiz de la jail

Revertir la jail

Antes se detiene la jail

 iocage stop vikingo

Revertir el conjunto de datos a una instantánea

 iocage rollback -n snap_vikingo00 vikingo

Dump snapshot

Crear snapshot de la carcel con iocage

 iocage snapshot -n snap00_vikingo vikingo
Snapshot: zroot/iocage/jails/vikingo@snap00_vikingo created.

Listar snapshots

iocage snaplist vikingo

 iocage snaplist vikingo
+---------------------+-----------------------+-------+------+
|        NAME         |        CREATED        | RSIZE | USED |
+=====================+=======================+=======+======+
| snap00_vikingo      | Tue Jan 31  9:35 2023 | 116K  | 0B   |
+---------------------+-----------------------+-------+------+
| snap00_vikingo/root | Tue Jan 31  9:35 2023 | 1.47G | 0B   |
+---------------------+-----------------------+-------+------+

Visualizar desde ZFS

zfs list -t snapshot| grep vikingo
zroot/iocage/jails/vikingo@snap00_vikingo        0B      -      116K  -
zroot/iocage/jails/vikingo/root@snap00_vikingo   0B      -     1.47G  -
zroot/iocage/releases/13.1-RELEASE/root@vikingo  0B      -     1.46G  -

Tenemos dos snapshots, nos interesa el del sistema de ficheros raiz

Dump snapshot a un fichero

 zfs send zroot/iocage/jails/vikingo/root@snap00_vikingo > /root/vikingo.raw

Es recomendable hacer copias los ficheros de configuracion

 cp /iocage/jails/vikingo/config.json /root/vikingo
 cp /iocage/jails/vikingo/fstab /root/vikingo

Destruir el snapshot

 iocage snapremove -n snap00_vikingo vikingo
Snapshot: zroot/iocage/jails/vikingo@snap00_vikingo destroyed

Comprobar

 zfs list -t snapshot | grep vikingo
zroot/iocage/releases/13.1-RELEASE/root@vikingo   0B   -     1.46G  -

Restaurar el dataset ZFS

 zfs recv -dvu zroot/iocage/jails/vikingo < /root/vikingo/vikingo.raw
receiving full stream of zroot/iocage/jails/vikingo/root@snap01_vikingo_310123 \
into zroot/iocage/jails/vikingo/iocage/jails/vikingo/root@snap01_vikingo_310123
received 2.74G stream in 5 seconds (561M/sec)
FreeBSD es genial!.

domingo, 18 de diciembre de 2022

Replicar, Recuperar Pool Root FreeBSD ZFS

NFS Sistema de Archivos en Red FreeBSD
Montaje de Sistema de Archivos NFS Usando Autofs
Replicar, Recuperar Pool Root ZFS FreeBSD

Contruir o reconstruir un sistema a partir de instantáneas (snapshot)

Replicar instantáneas en otro sistema es una característica de OpenZFS que mejora la administración de datos, proporciona un mecanismo para manejar una falla de hardware con una pérdida de datos y un tiempo de inactividad mínimos. La replicación también es una forma conveniente de transferir una copia de un sistema existente a otro, por ejemplo, implementar un laboratorio completo de sistemas similares.

Escenario

Servidor: tormenta FreeBSD 13.1 NUC 11 Essential DDR4-2933 CPU 4 \
          32GB RAM M.2 NVMe PCIe 3.0
Cliente: solaris FreeBSD 13.1 Dell Latitude 7390 DDR4-2400 CPU 8 \
          16GB RAM M.2 NVMe PCIe 3.0

Enviar una copia de seguridad al servidor vía ssh utilizando zfs send receive

% cat /etc/hosts | grep tormenta
...
192.168.88.160          tormenta
...

Configurar acceso SSH

OpenZFS utiliza SSH para cifrar la replicación durante la transferencia de red.

Puede generar un par de claves con ssh-keygen y luego enviar una copia de la clave pública al servidor. Presione enter en todas las indicaciones para aceptar los valores predeterminados y no solicitar una frase de contraseña.

Dado que root enviará la replica, cambie esta línea en el archivo de configuración del demonio SSH /etc/ssh/sshd_config

#PermitRootLogin no

a

PermitRootLogin yes

Recargar la configuración del demonio SSH

service sshd reload

Enviar una copia de la clave pública al sistema recector (tormenta)

cat ~/.ssh/id_rsa.pub | ssh 192.168.88.160 'cat >>.ssh/authorized_keys' 
Password for root@192.168.88.160: 
exit

Crear un conjunto de datos para almacenar las instatáneas replicadas /usr/backup/poolrecovery.

tormenta # zfs create -p zroot/usr/backup/poolrecovery

Creamos la instantánea recursiva del conjunto de datos del pool zroot que incluye los sistemas de archivos secundarios

solaris # zfs snapshot -r zroot@zroot.snap1_dell

Comprobar los recursos compartidos por el servidor tormenta

solaris % showmount -e tormenta
Exports list on tormenta:
...
/usr/backup/poolrecovery        192.168.88.0 
...

Montar el recurso compartido

# mount -o soft,intr,rw tormenta:/usr/backup/poolrecovery /mnt

Enviar la instantánea de forma recursiva, redirigimos (como archivo comprimido .gz) a la ubicación compartida para poder acceder a esta ubicación al construir el cliente

# zfs send -Rv zroot@snap1_dell | gzip > /mnt/zroot.snap1.gz

Enviar a un sistema que se encuentra en otra ubicación geografica a través de una conexión ssh

zfs send -Rv zroot@snap-20241125 | ssh root@185.166.84.138 "gzip > \ 
/export/recovery/solaris/zroot@snap-solaris-20241125.gz"

Enviar al servidor de la red local a través de una conexión ssh

zfs send -Rv zroot@snap-20241125 | ssh root@192.168.88.160 "gzip > \ 
/export/recovery/solaris/zroot@snap-solaris-20241125.gz"

Proceso de recuperación

Asumimos que ha realizado una instalación limpia en el sistema a restaurar eligiendo el particionado auto ZFS en el instalador FreeBSD.

Iniciar con una memoria usb que contenga una img de FreeBSD 13.1 (misma RELEASE usada en la instalación del sistema a recuperar)

En la pantalla de instalacion

Install Shell Live cd

Elegir (live cd)

login: root

Intro (no necesita contrasena)

Iniciar la red con el comando

dhclient em0

Ver información de la conexión

# ifconfig

Comprobar conectividad

# ping freebsd.org

Importar el zpool

mkdir /tmp/zroot
zpool import -fR /tmp/zroot zroot

Para poder recibir directamente sobre zroot (sin el error de hijos), renombrar los conjuntos de datos de la instalación limpia a .old antes de lanzar el zfs receive.

Alternativa más elegante (un solo comando para todos)

Renombrar TODOS los hijos directos de zroot

for ds in $(zfs list -H -o name zroot | grep -v "^zroot$"); do 
	zfs rename -r "$ds" "${ds}.old"
done

Esto captura ROOT, tmp, usr, var, home y cualquier otro que haya aparecido.

Inspeccionar el contenido del backup antes de recibirlo (por comprobar su estructura)

ssh root@192.168.88.160 "cat /zbackup/recovery/solaris/zroot@snap-freebsd-14.3-release-p7-2026-5-enero.gz" | gzcat | zfs receive -nv zroot

La opción -n (dry-run) simula la recepción y muestra qué datasets se crearían, sin escribir nada.

Si se quere ver el progreso en porcentaje durante la transferencia, se puede intercalar pv (si está instalado)

ssh root@192.168.88.160 "cat /zbackup/recovery/solaris/zroot@snap-freebsd-14.3-release-p7-2026-5-enero.gz" | gzcat | pv | zfs receive -Fv zroot

Justo después de renombrar los datasets viejos (.old), y antes del zfs receive real, puedes añadir este paso de verificación robusta:

Verificación robusta

Verificación con zstreamdump (muestra resumen + checksum). zstreamdump puede ser lento con backups grandes y es opcional, pero muy recomendable para detectar corrupción antes de empezar.

ssh root@192.168.88.160 "cat /zbackup/recovery/solaris/zroot@snap-freebsd-14.3-release-p7-2026-5-enero.gz" | gzcat | zstreamdump

Si todo está bien, verás algo parecido a

BEGIN record
...
Total write size = 1234567890
END checksum = f1e2d3c4b5a6...

Pasar el archivo por red sin montar ningún directorio


Restaurar el backup (recibe directamente sobre zroot)

ssh root@192.168.88.160 "cat /zbackup/recovery/solaris/zroot@snap-freebsd-14.3-release-p7-2026-5-enero.gz" | gzcat | zfs receive -Fv zroot

VERIFICAR la Estructura Restaurada ANTES DE REINICIAR


Listar toda la jerarquía restaurada

zfs list -r zroot

Buscar el dataset que contiene el directorio /boot (señal inequívoca de sistema base)

zfs list -r zroot/ROOT
NAME                                           USED  AVAIL  REFER  MOUNTPOINT
zroot/ROOT                                     110G   177G    96K  none
zroot/ROOT/default                             110G   177G  26.5G  /

Confirmar el arranque apuntando a este conjunto de datos

zpool set bootfs=zroot/ROOT/default zroot

Ajustar el punto de montaje para que al reiniciar se monte en /

zfs set mountpoint=/ zroot/ROOT/default

Exportar el zpool y reiniciar

zpool export zroot
shutdown -r now

Si después de reiniciar todo funciona, limpiar los restos de la vieja instalación (ya dentro del nuevo sistema)

zfs destroy -rf zroot/ROOT.old zroot/tmp.old zroot/usr.old zroot/var.old zroot/home.old

-r recursivamente destruye todos los hijos
-f Si algún dataset está montado fuerza el desmontaje del conjunto de datos

FreeBSD es genial!.

lunes, 8 de noviembre de 2021

ZFS FreeBSD en modo monousuario

Proceso de arranque

En el proceso de arranque, FreeBSD ofrece un menú de arranque beastie-start con algunas opciones simples de carga. Para iniciar el modo monousuario se pulsa el numero 2 (Boot single user).

Para que todos sus conjuntos de datos ZFS estén disponibles se utiliza zfs mount. También pueden montarse conjuntos de datos individuales por nombre.

 Enter root password, or ˆD to go multi-user
 Password: Enter full pathname of shell or RETURN for /bin/sh:
 zfs mount -a
 mount zroot/ROOT/default on / (zfs, local, noatime, read-ly, nfs4acls)

Montar conjunto de datos en modo rw

ZFS realizará sus comprobaciones de integridad habituales antes de montar los conjunto de datos.La mayoría de los conjuntos de datos serán exactamente tan accesibles como en el modo multiusuario, pero el conjunto de datos montado como raíz seguirá siendo de solo lectura. Montar el conjunto de datos raíz en modo lectura-escritura (rw)) en una instalación predeterminada de FreeBSD.

  zfs set readonly=off zroot/ROOT/default
 

Para tener conectividad de red en modo de usuario único, se ejecuta el shell script

 /etc/netstart.

Ejecutar scripts

Este script llama a los scripts apropiados para iniciar la red, proporciona direcciones IP a las interfaces y habilita el filtrado de paquetes y el enrutamiento. Si determina que hay un error tipográfico en /etc/fstab que confunde al sistema y lo hace no arrancable, puede editar /etc/fstab para resolver el problema. Si hay un programa que hace que el sistema entre en pánico al arrancar y hay que detener ese programa para que no se inicie de nuevo, puede editar

  vim /etc/rc.conf
 

Para configurar los permisos en el script de inicio y no se ejecute.

 chmod a-x /usr/local/etc/rc.d/nombredelprogram.sh

Reiniciar

 reboot
FreeBSD es genial!.

domingo, 3 de octubre de 2021

FreeBSD vm-bhyve X11 Forwarding usando SSH

Ejecutar aplicaciones X11 desde invitado vm-bhyve en host.

La(s) aplicacion(es) se ejecutan en la máquina virtual invitada, sin embargo, se muestra en el host. La importancia de esto radica en que puede ejecutar una aplicación en una lugar y mostrar la ventana en el host.

Si una aplicación no es soportada en la máquina host pero bien soportada en la vm podrá ejecutarse en una ventana del host.

Ejecutar Firefox en una vm y mostrarlo en el host FreeBSD 13.0
basado en el reenvío X11 usando ssh.

# vm list
NAME          DATASTORE  LOADER     CPU  MEMORY  VNC  AUTOSTART  STATE
alpine        default    grub       1    512M    -    No         Stopped
arch          default    grub       1    512M    -    No         Stopped
freebsd-12-2  default    bhyveload  1    256M    -    No         Stopped

Iniciar y conectarse a la máquina virtual para permitir el reenvío X11.

# vm start alpine
# vm console alpine

# vm switch info

------------------------
Virtual Switch: public
------------------------
  type: standard
  ident: vm-public
  vlan: -
  physical-ports: re0
  bytes-in: 673338 (657.556K)
  bytes-out: 602940 (588.808K)

  virtual-port
    device: tap2
    vm: alpine

# vm info

------------------------
Virtual Machine: alpine
------------------------
  state: running (25889)
  datastore: default
  loader: grub
  uuid: 3dfa8278-1ca9-11ec-b451-fc3fdbd15275
  uefi: default
  cpu: 1
  memory: 512M
  memory-resident: 123006976 (117.308M)

  console-ports
    com1: /dev/nmdm-alpine.1B

  network-interface
    number: 0
    emulation: virtio-net
    virtual-switch: public
    fixed-mac-address: 58:9c:fc:03:37:ea
    fixed-device: -
    active-device: tap2
    desc: vmnet-alpine-0-public
    mtu: 1500
    bridge: vm-public
    bytes-in: 291480 (284.648K)
    bytes-out: 2158 (2.107K)

  virtual-disk
    number: 0
    device-type: file
    emulation: virtio-blk
    options: -
    system-path: /zroot/vm/alpine/disk0.img
    bytes-size: 10737418240 (10.000G)
    bytes-used: 1160348672 (1.080G)

  snapshots
    zroot/vm/alpine@snap1_300921	452K	jue. sept. 30 17:31 2021

------------------------
Virtual Machine: arch
------------------------
  state: running (43467)
  datastore: default
  loader: grub
  uuid: a923082e-1deb-11ec-9f91-fc3fdbd15275
  uefi: default
  cpu: 1
  memory: 512M
  memory-resident: 164139008 (156.535M)

  console-ports
    com1: /dev/nmdm-arch.1B

  network-interface
    number: 0
    emulation: virtio-net
    virtual-switch: public
    fixed-mac-address: 58:9c:fc:0e:36:e4
    fixed-device: -
    active-device: tap0
    desc: vmnet-arch-0-public
    mtu: 1500
    bridge: vm-public
    bytes-in: 15132 (14.777K)
    bytes-out: 0 (0.000B)

  virtual-disk
    number: 0
    device-type: file
    emulation: virtio-blk
    options: -
    system-path: /zroot/vm/arch/disk0.img
    bytes-size: 9663676416 (9.000G)
    bytes-used: 4176012288 (3.889G)

  snapshots
    zroot/vm/arch@snap1_300921	2.55M	jue. sept. 30 17:31 2021

------------------------
Virtual Machine: freebsd-12-2
------------------------
  state: running (52279)
  datastore: default
  loader: bhyveload
  uuid: e7d636e0-236b-11ec-8cb5-fc3fdbd15275
  uefi: default
  cpu: 1
  memory: 256M
  memory-resident: 138010624 (131.617M)

  console-ports
    com1: /dev/nmdm-freebsd-12-2.1B

  network-interface
    number: 0
    emulation: virtio-net
    virtual-switch: public
    fixed-mac-address: 58:9c:fc:0b:f1:00
    fixed-device: -
    active-device: tap1
    desc: vmnet-freebsd-12-2-0-public
    mtu: 1500
    bridge: vm-public
    bytes-in: 300815 (293.764K)
    bytes-out: 1947 (1.901K)

  virtual-disk
    number: 0
    device-type: file
    emulation: virtio-blk
    options: -
    system-path: /zroot/vm/freebsd-12-2/disk0.img
    bytes-size: 9663676416 (9.000G)
    bytes-used: 2805482496 (2.612G)

# /etc/hosts

# Host Database
#
# This file should contain the addresses and aliases for local hosts that
# share this file.  Replace 'my.domain' below with the domainname of your
# machine.
#
# In the presence of the domain name service or NIS, this file may
# not be consulted at all; see /etc/nsswitch.conf for the resolution order.
#
#
::1                     localhost localhost.my.domain
127.0.0.1               localhost localhost.my.domain
192.168.88.183          fbsd
192.168.88.149          arch
192.168.88.150          alpine
192.168.88.151          freebsd-12-2
#
# Imaginary network.
#10.0.0.2               myname.my.domain myname

carlos@freebsd:~ % ssh carlos@alpine

The authenticity of host 'alpine (192.168.88.150)' can't be established.
ECDSA key fingerprint is SHA256:SwvwUhTBiIMr4IdzZ4yvaIcu21Xf4WSF2B5+tABLHz0.
No matching host key fingerprint found in DNS.
Are you sure you want to continue connecting (yes/no)? yes
Warning: Permanently added 'alpine' (ECDSA) to the list of known hosts.
carlos@alpine's password:
Welcome to Alpine!

The Alpine Wiki contains a large amount of how-to guides and general
information about administrating Alpine systems.
See <http://wiki.alpinelinux.org/>.

You can setup the system with the command: setup-alpine

You may change this message by editing /etc/motd.

alpine:~$ su
Password:
alpine:/home/carlos# 

alpine:/home/carlos#  apk update
fetch http://dl-cdn.alpinelinux.org/alpine/v3.14/main/x86_64/APKINDEX.tar.gz
v3.14.2-68-gbf3cc5c973 [http://dl-cdn.alpinelinux.org/alpine/v3.14/main]
OK: 4791 distinct packages available

alpine:/home/carlos#  apk add vim
OK: 1008 MiB in 146 packages

Cambiar en el archivo /etc/ssh/sshd_config

alpine:/home/carlos# vim /etc/ssh/sshd_config

X11Forwarding no
por
X11Forwarding yes

Guardar y salir

alpine:/home/carlos# vim /etc/apk/repositories 

#/media/cdrom/apks
#http://dl-cdn.alpinelinux.org/alpine/v3.14/main
#http://dl-cdn.alpinelinux.org/alpine/v3.14/community
http://dl-cdn.alpinelinux.org/alpine/edge/main
http://dl-cdn.alpinelinux.org/alpine/edge/community
http://dl-cdn.alpinelinux.org/alpine/edge/testing

alpine:/home/carlos# apk update
fetch http://dl-cdn.alpinelinux.org/alpine/edge/main/x86_64/APKINDEX.tar.gz
fetch http://dl-cdn.alpinelinux.org/alpine/edge/community/x86_64/APKINDEX.tar.gz
fetch http://dl-cdn.alpinelinux.org/alpine/edge/testing/x86_64/APKINDEX.tar.gz
v3.15.0_alpha20210804-3464-gdb0fea5e0a [http://dl-cdn.alpinelinux.org/alpine/edge/main]
v3.15.0_alpha20210804-3463-g250f668bc0 [http://dl-cdn.alpinelinux.org/alpine/edge/community]
v3.15.0_alpha20210804-3457-g949ce4d971 [http://dl-cdn.alpinelinux.org/alpine/edge/testing]
OK: 20227 distinct packages available

alpine:/home/carlos# reboot

alpine:/home/carlos# Connection to alpine closed by remote host.
Connection to alpine closed.
carlos@freebsd:~ %

carlos@freebsd:~ % ssh carlos@alpine
carlos@alpine's password:
Welcome to Alpine!

The Alpine Wiki contains a large amount of how-to guides and general
information about administrating Alpine systems.
See <http://wiki.alpinelinux.org/>.

You can setup the system with the command: setup-alpine

You may change this message by editing /etc/motd.

alpine:~$ 

En la máquina host, (freebsd), utilizando xhost se habilita sólo al usuario autorizado.

carlos@freebsd:~ % xhost
access control enabled, only authorized clients can connect

Se añade la dirección IP de Alpine:

carlos@freebsd:~ % xhost +inet:192.168.88.150
192.168.88.150 being added to access control list
carlos@freebsd:~ %

Ejecutar la aplicación Firefox
dentro de la máquina virtual, pero sólo se muestra en el host:

Se ejecuta usando ssh:

carlos@freebsd:~ % ssh carlos@alpine -X "firefox no-remote"
carlos@alpine's password:
Welcome to Alpine!

The Alpine Wiki contains a large amount of how-to guides and general
information about administrating Alpine systems.
See <http://wiki.alpinelinux.org/>.

You can setup the system with the command: setup-alpine

You may change this message by editing /etc/motd.

/usr/bin/xauth:  file /home/carlos/.Xauthority does not exist
alpine:~$

Para no introducir más contraseñas se generan las claves pública y privada nuevamente:

carlos@freebsd:~ % ssh-keygen -t rsa -b 4096 -C "carlos@freebsd"
Generating public/private rsa key pair.
Enter file in which to save the key (/usr/home/carlos/.ssh/id_rsa): 
Enter passphrase (empty for no passphrase): 
Enter same passphrase again: 
Your identification has been saved in /usr/home/carlos/.ssh/id_rsa.
Your public key has been saved in /usr/home/carlos/.ssh/id_rsa.pub.
The key fingerprint is:
SHA256:RkURbfj//UwqDmVOhVOQQ1qMae69/DZueCzFliRdHZc carlos@freebsd
The key's randomart image is:
+---[RSA 4096]----+
|         .=X+=.o+|
|         .=oO oEo|
|        .o.= =   |
|       .  o B    |
|        S. O o   |
|       .  o B .  |
|           Oo. .o|
|          o.Oo +o|
|           +.oo +|
+----[SHA256]-----+

Arch Linux instalar openssh
# vim /etc/pacman.conf

[multilib]
Include = /etc/pacman.d/mirrorlist

Guardar y salir

# pacman -Syu

# pacman -S openssh

[root@arch ~]# systemctl status sshd
* sshd.service - OpenSSH Daemon
     Loaded: loaded (/usr/lib/systemd/system/sshd.service; disabled; vendor pre>
     Active: inactive (dead)
     
[root@arch ~]# systemctl start sshd
[root@arch ~]# ls -a
.   .bash_history  .config  .lesshst  Desktop	 Downloads  Pictures  Templates
..  .cache	   .gnupg   .viminfo  Documents  Music	    Public    Videos

[root@arch ~]# systemctl status sshd
* sshd.service - OpenSSH Daemon
     Loaded: loaded (/usr/lib/systemd/system/sshd.service; disabled; vendor pre>
     Active: active (running) since Mon 2021-10-04 19:03:03 CEST; 37s ago

Iniciar el servicio sshd con el arranque del sistema:

[root@arch ~]# systemctl enable sshd

Copiar a las vm

carlos@freebsd:~ % ssh-add
Identity added: /usr/home/carlos/.ssh/id_rsa (carlos@freebsd)
carlos@freebsd:~ % ssh-copy-id carlos@alpine
carlos@alpine's password: 
carlos@freebsd:~ % 

El procedimiento es el mismo para las demás máquinas virtuales

carlos@freebsd:~ % ssh-copy-id carlos@arch
carlos@alpine's password: 
carlos@freebsd:~ %      
           
carlos@freebsd:~ % ssh-copy-id carlos@freebsd-12-2
carlos@alpine's password: 
carlos@freebsd:~ %                           
                  
Llegados a este punto la conexión ssh se realiza mediante clave.

carlos@freebsd:~ % ssh carlos@alpine -X "firefox no-remote" &
[1] 96751
carlos@freebsd:~ %

carlos@freebsd:~ % su
Password:

root@freebsd:/usr/home/carlos # vm list
NAME          DATASTORE  LOADER     CPU  MEMORY  VNC  AUTOSTART  STATE
alpine        default    grub       1    512M    -    No         Running (40797)
arch          default    grub       1    512M    -    No         Stopped
freebsd-12-2  default    bhyveload  1    256M    -    No         Stopped
root@freebsd:/usr/home/carlos # vm stop alpine
Sending ACPI shutdown to alpine
root@freebsd:/usr/home/carlos # vm list
NAME          DATASTORE  LOADER     CPU  MEMORY  VNC  AUTOSTART  STATE
alpine        default    grub       1    512M    -    No         Stopped
arch          default    grub       1    512M    -    No         Stopped
freebsd-12-2  default    bhyveload  1    256M    -    No         Stopped
root@freebsd:/usr/home/carlos # 

FreeBSD es genial!.

martes, 14 de septiembre de 2021

Firewall IPFW Freebsd

 https://docs.freebsd.org/en/books/handbook/firewalls/#firewalls-ipfw

Nota: Extensiones imprescindibles Firefox 78.14.0 esr (64-bit)

IPFW - proteger una estación de trabajo freeBSD y permitir acceso remoto vía SSH.

IPFW es un cortafuegos stateful escrito para FreeBSD que soporta tanto IPv4 como IPv6. Está formado por varios componentes: el procesador de reglas de filtrado del kernel y su función integrada de contabilidad de paquetes, la función de registro, NAT, el conformador de tráfico dummynet(4), una función de reenvío, una función de puente y una función ipstealth.

# sysrc firewall_enable="YES"
# sysrc firewall_script="/etc/ipfw.rules"
# sysrc firewall_logging="YES"
# echo "net.inet.ip.fw.verbose_limit=5" >> /etc/sysctl.conf
# sysrc firewall_logif="YES"
# service ipfw start
# sysctl net.inet.ip.fw.verbose_limit=5
% cat /etc/ipfw.rules
###################################
#!/bin/sh
ipfw -q -f flush

LAN="192.168.88.0/24"
cmd="/sbin/ipfw -q add"
pif="re0"

$cmd 00100 allow ip from any to any via lo0
$cmd 00200 deny ip from any to 127.0.0.0/8
$cmd 00300 deny ip from 127.0.0.0/8 to any
$cmd 00400 deny ip from any to ::1
$cmd 00500 deny ip from ::1 to any
$cmd 00600 allow ipv6-icmp from :: to ff02::/16
$cmd 00700 allow ipv6-icmp from fe80::/10 to fe80::/10
$cmd 00800 allow ipv6-icmp from fe80::/10 to ff02::/16
$cmd 00900 allow ipv6-icmp from any to any icmp6types 1
$cmd 01000 allow ipv6-icmp from any to any icmp6types 2,135,136
$cmd 01100 check-state :default
$cmd 01200 allow tcp from me to any established
$cmd 01300 allow tcp from me to any setup keep-state :default
$cmd 01400 allow udp from me to any keep-state :default
$cmd 01500 allow icmp from me to any keep-state :default
$cmd 01600 allow ipv6-icmp from me to any keep-state :default
$cmd 01700 allow udp from 0.0.0.0 68 to 255.255.255.255 67 out
$cmd 01800 allow udp from any 67 to me 68 in
$cmd 01900 allow udp from any 67 to 255.255.255.255 68 in
$cmd 02000 allow udp from fe80::/10 to me 546 in
$cmd 02100 allow icmp from any to any icmptypes 8
$cmd 02200 allow ipv6-icmp from any to any icmp6types 128,129
$cmd 02300 allow icmp from any to any icmptypes 3,4,11
$cmd 02400 allow ipv6-icmp from any to any icmp6types 3
$cmd 02500 allow tcp from $LAN to me 22 in via $pif setup limit src-addr 2
$cmd 65000 count ip from any to any
$cmd 65100 deny { tcp or udp } from any to any 135-139,445 in
$cmd 65200 deny { tcp or udp } from any to any 1026,1027 in
$cmd 65300 deny { tcp or udp } from any to any 1433,1434 in
$cmd 65400 deny ip from any to 255.255.255.255
$cmd 65500 deny ip from any to 224.0.0.0/24 in
$cmd 65500 deny udp from any to any 520 in
$cmd 65500 deny tcp from any 80,443 to any 1024-65535 in
$cmd 65500 deny ip from any to any
$cmd 65535 deny ip from any to any
###################################


FreeBSD es genial!.

viernes, 23 de julio de 2021

Wireshark con Privilegios de Administrador MacOS


macOS High Sierra Versión 10.13.6 
MacBook Pro 13 pulgadas
Memoria: 16 GB 1600 MHz DDR3
Procesador: 2,5 GHz Intel Core i5
Gráficos: Intel HD Graphics 4000 1536 MB

Desde el sitio web del desarrollador (www.wireshark.org) es posible descargar para MacOS (.dmg) el instalador para el analizador de red Wireshark. Después de instalado si salta un error al intentar capturar el tráfico con un mensaje como "La sesión de captura no se pudo iniciar en la interfaz 'en0' (usted no tiene permiso para capturar en ese dispositivo"):


Puede optar por iniciar la aplicación con privilegios de Administrador utilizando la solución publicada, en su momento, por el usuario gmale en ask.wireshark.org.

Como saber el nombre de usuario?:

MacBook-Pro-de-Carlos:~ carlosc$ whoami 

carlosc


Abrir el editor de Scripts y desde Archivo Elegir NUEVO
En la ventana abierta escriba:

do shell script "/Applications/Wireshark.app/Contents/MacOS/Wireshark" user name "carlosc" password "password" with administrator privileges


Luego, exportar la secuencia de comandos como Aplicación, -> Archivo -> Exportar, y cambiar el Formato de archivo a la aplicación, escriba un nombre para su archivo y guárdelo. Ejecutar el script:


FreeBSD es Genial!

sábado, 27 de febrero de 2021

Configurar VLAN Trunks y Routing Cisco

Packet Tracer 7


1.- En todos los Switches de Valencia, configurar Trunk utilizando trunk encapsulation, y asegúrese de que el trunk no se convierta dinámicamente en un puerto de acceso.

2.- Crear VLANs 10 (STATIC) 10.16.0.0/24, 20 (VoIP) 10.16.2.0/24, 30 (PUBLIC) 10.16.4.0/23, 40 (CLIENT) 10.16.6.0/23 en todos los Switches manualmente o utilizando VTP.

3.- Limitar todos los Trunks para llevar sólo VLANs 1, 10, 20.

4.- Configurar R1-AS como un Router on a Stick (ROAS) que proporcione enrutamiento entre clientes en VLAN 10 y VLAN 20.

Configuración inicial

R1#wrt
Translating "wit"...domain server (255.255.255.255)
% Unknown command or computer name, or unable to find computer address

Si no necesita tener un servidor DNS configurado para su router, utilice el comando no ip domain-lookup para deshabilitar el proceso de traducción de DNS:

Enter configuration commands, one per line.  End with CNTL/Z.
RT01-VA(config)#no ip domain-lookup 
RT01-VA(config)#do wri
Building configuration...
[OK]
RT01-VA(config)#

MAN#conf t
Enter configuration commands, one per line.  End with CNTL/Z.
MAN(config)#no ip domain-lookup
MAN(config)#do wri
Building configuration...
[OK]
MAN(config)#

RT02-BCN#conf t
Enter configuration commands, one per line.  End with CNTL/Z.
RT02-BCN(config)#no ip domain-lookup 
RT02-BCN(config)#do wri
Building configuration...
[OK]

TR03-ZA#conf t
Enter configuration commands, one per line.  End with CNTL/Z.
TR03-ZA(config)#no ip domain-lookup 
TR03-ZA(config)#do wri

Core2#conf t
Enter configuration commands, one per line.  End with CNTL/Z.
Core2(config)#no ip domain-lookup 
Core2(config)#do wri

Core1#conf t
Enter configuration commands, one per line.  End with CNTL/Z.
Core1(config)#no ip domain-l
Core1(config)#no ip domain-lookup 
Core1(config)#do wri

Access#conf t
Enter configuration commands, one per line.  End with CNTL/Z.
Access(config)#no ip domain-l
Access(config)#no ip domain-lookup 
Access(config)#do wri

En todos los Switches de Valencia, configurar Trunk utilizando trunk encapsulation, y asegúrese de que el trunk no se convierta dinámicamente en un puerto de acceso.

Core1#conf t
Enter configuration commands, one per line.  End with CNTL/Z.
Core1(config)#interface gigabitEthernet 1/0/1
Core1(config-if)#switchport trunk encapsulation dot1q 
Core1(config-if)#switchport mode trunk 

Core1(config-if)#
%LINEPROTO-5-UPDOWN: Line protocol on Interface GigabitEthernet1/0/1, changed state to down

%LINEPROTO-5-UPDOWN: Line protocol on Interface GigabitEthernet1/0/1, changed state to up

%LINEPROTO-5-UPDOWN: Line protocol on Interface Vlan10, changed state to up

%LINEPROTO-5-UPDOWN: Line protocol on Interface Vlan20, changed state to up

%LINEPROTO-5-UPDOWN: Line protocol on Interface Vlan30, changed state to up

%LINEPROTO-5-UPDOWN: Line protocol on Interface Vlan40, changed state to up

Core1(config-if)#exit
Core1(config)#interface gigabitEthernet 1/0/2
Core1(config-if)#switchport trunk encapsulation dot1q 
Core1(config-if)#switchport mode trunk 

Core1(config-if)#
%LINEPROTO-5-UPDOWN: Line protocol on Interface GigabitEthernet1/0/2, changed state to down

%LINEPROTO-5-UPDOWN: Line protocol on Interface GigabitEthernet1/0/2, changed state to up

Core1(config-if)#exit
Core1(config)#sw
Core1(config)#inter
Core1(config)#interface g
Core1(config)#interface gigabitEthernet 1/0/23
Core1(config-if)#switchport trunk encapsulation dot1q 
Core1(config-if)#switchport mode trunk 

Core1(config-if)#
%LINEPROTO-5-UPDOWN: Line protocol on Interface GigabitEthernet1/0/23, changed state to down

%LINEPROTO-5-UPDOWN: Line protocol on Interface GigabitEthernet1/0/23, changed state to up

Core1(config-if)#exit
Core1(config)#interface gigabitEthernet 1/0/24
Core1(config-if)#switchport trunk encapsulation dot1q 
Core1(config-if)#switchport mode trunk 

Core1(config-if)#
%LINEPROTO-5-UPDOWN: Line protocol on Interface GigabitEthernet1/0/24, changed state to down

%LINEPROTO-5-UPDOWN: Line protocol on Interface GigabitEthernet1/0/24, changed state to up

Core1(config-if)#do wri
Building configuration...
Compressed configuration from 7383 bytes to 3601 bytes[OK]
[OK]
Core1(config-if)#

Core2(config)#inter
Core2(config)#interface g
Core2(config)#interface gigabitEthernet 1/0/1
Core2(config-if)#switchport trunk encapsulation dot1q 
Core2(config-if)#switchport mode trunk 

Core2(config-if)#
%LINEPROTO-5-UPDOWN: Line protocol on Interface GigabitEthernet1/0/1, changed state to down

%LINEPROTO-5-UPDOWN: Line protocol on Interface GigabitEthernet1/0/1, changed state to up

Core2(config-if)#exit
Core2(config)#interface gigabitEthernet 1/0/23
Core2(config-if)#switchport trunk encapsulation dot1q 
Core2(config-if)#switchport mode trunk 
Core2(config-if)#exit
Core2(config)#interface gigabitEthernet 1/0/24
Core2(config-if)#switchport trunk encapsulation dot1q 
Core2(config-if)#switchport mode trunk 
Core2(config-if)#exit
Core2(config)#do wri
Building configuration...
Compressed configuration from 7383 bytes to 3601 bytes[OK]
[OK]
Core2(config)#

Access#conf t
Enter configuration commands, one per line.  End with CNTL/Z.
Access(config)#inter
Access(config)#interface fa
Access(config)#interface fastEthernet 0/1
Access(config-if)#sw
Access(config-if)#switchport mode
Access(config-if)#switchport mode tr
Access(config-if)#switchport mode trunk 
Access(config-if)#exit
Access(config)#interface fastEthernet 0/2
Access(config-if)#switchport mode trunk 

Crear las VLANs en los Switches: Core1, Core2 y Access:

Core1(config)#vlan 10
Core1(config-vlan)#name STATIC
Core1(config-vlan)#exit
Core1(config)#vlan 20
Core1(config-vlan)#name VoIP
Core1(config-vlan)#exit
Core1(config)#vlan 30
Core1(config-vlan)#name PUBLIC
Core1(config-vlan)#exit
Core1(config)#vlan 40 
Core1(config-vlan)#name CLIENT
Core1(config-vlan)#exit
Core1(config)#inter
Core1(config)#interface vlan 10
Core1(config-if)#
%LINK-5-CHANGED: Interface Vlan10, changed state to up

Core1(config-if)#exit
Core1(config)#interface vlan 20
Core1(config-if)#
%LINK-5-CHANGED: Interface Vlan20, changed state to up

Core1(config-if)#exit
Core1(config)#interface vlan 30
Core1(config-if)#
%LINK-5-CHANGED: Interface Vlan30, changed state to up

Core1(config-if)#exit
Core1(config)#interface vlan 40
Core1(config-if)#
%LINK-5-CHANGED: Interface Vlan40, changed state to up

Core2#conf t
Enter configuration commands, one per line.  End with CNTL/Z.
Core2(config)#vlan 10
Core2(config-vlan)#name STATIC
Core2(config-vlan)#exit
Core2(config)#vlan 20
Core2(config-vlan)#name VoIP
Core2(config-vlan)#exit
Core2(config)#vlan 30
Core2(config-vlan)#name PUBLIC
Core2(config-vlan)#exit
Core2(config)#vlan 40
Core2(config-vlan)#name CLIENT
Core2(config-vlan)#exit
Core2(config)#interface vlan 10
Core2(config-if)#
%LINK-5-CHANGED: Interface Vlan10, changed state to up

Core2(config-if)#exit
Core2(config)#interface vlan 20
Core2(config-if)#
%LINK-5-CHANGED: Interface Vlan20, changed state to up

Core2(config-if)#exit
Core2(config)#interface vlan 30
Core2(config-if)#
%LINK-5-CHANGED: Interface Vlan30, changed state to up

Core2(config-if)#exit
Core2(config)#interface vlan 40
Core2(config-if)#
%LINK-5-CHANGED: Interface Vlan40, changed state to up

Core2(config-if)#exit

Access>en
Access#conf t
Access(config)#vlan 10
Access(config-vlan)#name STATIC
Access(config-vlan)#exit
Access(config)#vlan 20
Access(config-vlan)#name VoIP
Access(config-vlan)#exit
Access(config)#vlan 30
Access(config-vlan)#name PUBLIC
Access(config-vlan)#exit
Access(config)#vlan 40
Access(config-vlan)#name CLIENT
Access(config-vlan)#exit
Access(config)#inter
Access(config)#interface vlan 10
Access(config-if)#
%LINK-5-CHANGED: Interface Vlan10, changed state to up

Access(config-if)#exit
Access(config)#inter
Access(config)#interface vlan 20
Access(config-if)#
%LINK-5-CHANGED: Interface Vlan20, changed state to up

Access(config-if)#exit
Access(config)#inter
Access(config)#interface vlan 30
Access(config-if)#
%LINK-5-CHANGED: Interface Vlan30, changed state to up

Access(config-if)#exit
Access(config)#inter
Access(config)#interface vlan 40
Access(config-if)#
%LINK-5-CHANGED: Interface Vlan40, changed state to up

Access(config-if)#exit
Access(config)#do wri
Building configuration...
[OK]

Access(config)#do sh vlan

VLAN Name                             Status    Ports
---- ------------------- --------- -------------------------------
1    default              active    Fa0/1, Fa0/2, Fa0/3, Fa0/4
                                    Fa0/5, Fa0/6, Fa0/7, Fa0/8
                                    Fa0/9, Fa0/10, Fa0/11, Fa0/12
                                    Fa0/13, Fa0/14, Fa0/15, Fa0/16
                                    Fa0/17, Fa0/18, Fa0/19, Fa0/20
                                    Fa0/21, Fa0/22, Fa0/23, Fa0/24
                                    Gig0/1, Gig0/2
10   STATIC                  active    
20   VoIP                    active    
30   PUBLIC                  active    
40   CLIENT                  active    
1002 fddi-default            act/unsup 
1003 token-ring-default      act/unsup 
1004 fddinet-default         act/unsup 
1005 trnet-default           act/unsup 

VLAN Type  SAID       MTU   Parent RingNo BridgeNo Stp  BrdgMode Trans1 Trans2
---- ----- ---------- ----- ------ ------ -------- ---- -------- ------ ------
1    enet  100001     1500  -      -      -        -    -        0      0

Access(config)#do wri
Building configuration...
[OK]
Access(config)#

Limitar todos los Trunks para llevar sólo las VLANs 1, 10, 20.

Core1#conf t
Enter configuration commands, one per line.  End with CNTL/Z.
Core1(config)#interface gigabitEthernet 1/0/1
Core1(config-if)#switchport trunk allowed vlan 1,10,20

Core1(config-if)#exit
Core1(config)#interface gigabitEthernet 1/0/2
Core1(config-if)#switchport trunk allowed vlan 1,10,20
Core1(config-if)#exit
Core1(config)#interface gigabitEthernet 1/0/23
Core1(config-if)#switchport trunk allowed vlan 1,10,20
Core1(config-if)#exit
Core1(config)#interface gigabitEthernet 1/0/24
Core1(config-if)#switchport trunk allowed vlan 1,10,20
Core1(config-if)#exit
Core1(config)#^Z
Core1#
%SYS-5-CONFIG_I: Configured from console by console

Core1#wri
Building configuration...
Compressed configuration from 7383 bytes to 3601 bytes[OK]
[OK]
Core1#sh inter
Core1#sh interfaces tr
Core1#sh interfaces trunk 
Port        Mode         Encapsulation  Status        Native vlan
Gig1/0/1    on           802.1q         trunking      1
Gig1/0/2    on           802.1q         trunking      1
Gig1/0/23   on           802.1q         trunking      1
Gig1/0/24   on           802.1q         trunking      1

Port        Vlans allowed on trunk
Gig1/0/1    1,10,20
Gig1/0/2    1,10,20
Gig1/0/23   1,10,20
Gig1/0/24   1,10,20

Port        Vlans allowed and active in management domain
Gig1/0/1    1,10,20
Gig1/0/2    1,10,20
Gig1/0/23   1,10,20
Gig1/0/24   1,10,20

Port        Vlans in spanning tree forwarding state and not pruned
Gig1/0/1    1,10,20
Gig1/0/2    1,10,20
Gig1/0/23   none
Gig1/0/24   none

Core1#

Core2#conf t
Enter configuration commands, one per line.  End with CNTL/Z.
Core2(config)#interface gigabitEthernet 1/0/1
Core2(config-if)#switchport trunk allowed vlan 1,10,20
Core2(config-if)#exit
Core2(config)#interface gigabitEthernet 1/0/23
Core2(config-if)#switchport trunk allowed vlan 1,10,20
Core2(config-if)#exit
Core2(config)#interface gigabitEthernet 1/0/24
Core2(config-if)#exit
Core2(config)#interface gigabitEthernet 1/0/24
Core2(config-if)#switchport trunk allowed vlan 1,10,20
Core2(config-if)#


Core2#sh interfaces trunk 
Port        Mode         Encapsulation  Status        Native vlan
Gig1/0/1    on           802.1q         trunking      1
Gig1/0/23   on           802.1q         trunking      1
Gig1/0/24   on           802.1q         trunking      1

Port        Vlans allowed on trunk
Gig1/0/1    1,10,20
Gig1/0/23   1,10,20
Gig1/0/24   1,10,20

Port        Vlans allowed and active in management domain
Gig1/0/1    1,10,20
Gig1/0/23   1,10,20
Gig1/0/24   1,10,20

Port        Vlans in spanning tree forwarding state and not pruned
Gig1/0/1    1,10,20
Gig1/0/23   1,10,20
Gig1/0/24   1,10,20

Core2#

Access#conf t
Enter configuration commands, one per line.  End with CNTL/Z.
Access(config)#interface fastEthernet 0/1
Access(config-if)#switchport trunk allowed vlan 1,10,20
Access(config-if)#exit
Access(config)#interface fastEthernet 0/2
Access(config-if)#switchport trunk allowed vlan 1,10,20
Access(config-if)#end
Access#
%SYS-5-CONFIG_I: Configured from console by console

Access#wri
Building configuration...
[OK]

Access#sh interfaces trunk 
Port        Mode         Encapsulation  Status        Native vlan
Fa0/1       on           802.1q         trunking      1
Fa0/2       on           802.1q         trunking      1

Port        Vlans allowed on trunk
Fa0/1       1,10,20
Fa0/2       1,10,20

Port        Vlans allowed and active in management domain
Fa0/1       1,10,20
Fa0/2       1,10,20

Port        Vlans in spanning tree forwarding state and not pruned
Fa0/1       20
Fa0/2       20

Access#

Configurar R1-AS como un Router on a Stick (ROAS), que proporcione enrutamiento entre clientes en VLAN 10 y VLAN 20.

RT01-VA#conf t
Enter configuration commands, one per line.  End with CNTL/Z.
RT01-VA(config)#interface vlan 10
RT01-VA(config-if)#ip address 10.16.0.1 255.255.255.0
%LINK-5-CHANGED: Interface Vlan10, changed state to up

RT01-VA(config-if)#exit
RT01-VA(config)#interface vlan 20
RT01-VA(config-if)#ip address 10.16.2.1 255.255.255.0
%LINK-5-CHANGED: Interface Vlan20, changed state to up

RT01-VA(config-if)exit
RT01-VA(config)#interface vlan 30
RT01-VA(config-if)#ip address 10.16.4.1 255.255.254.0
%LINK-5-CHANGED: Interface Vlan30, changed state to up

RT01-VA(config-if)exit
RT01-VA(config)#interface vlan 40
RT01-VA(config-if)#ip address 10.16.6.1 255.255.254.0
%LINK-5-CHANGED: Interface Vlan30, changed state to up

RT01-VA(config-if)#end
RT01-VA#WRI

RT01-VA#sh ip interface b
Interface              IP-Address      OK? Method Status                Protocol 
GigabitEthernet0/0     unassigned      YES unset  administratively down down 
GigabitEthernet0/1     unassigned      YES unset  administratively down down 
GigabitEthernet0/2     unassigned      YES unset  administratively down down 
FastEthernet0/0/0      unassigned      YES unset  up                    up 
FastEthernet0/0/1      unassigned      YES unset  up                    down 
FastEthernet0/0/2      unassigned      YES unset  up                    down 
FastEthernet0/0/3      unassigned      YES unset  up                    down 
Vlan1                  unassigned      YES unset  administratively down down 
Vlan10                 10.16.0.1       YES manual up                    down 
Vlan20                 10.16.2.1       YES manual up                    down 
Vlan30                 10.16.4.1       YES manual up                    down 
Vlan40                 10.16.6.1       YES manual up                    down

La interfaz el Router RT01-VA tiene que estar up y configurada en mode Trunk 
RT01-VA#conf t
Enter configuration commands, one per line.  End with CNTL/Z.
RT01-VA(config)#interface fastEthernet 0/0/0 
RT01-VA(config-if)#no shut
RT01-VA(config-if)#switchport mode trunk 

RT01-VA(config-if)#
%LINEPROTO-5-UPDOWN: Line protocol on Interface FastEthernet0/0/0, changed state to down

%LINEPROTO-5-UPDOWN: Line protocol on Interface FastEthernet0/0/0, changed state to up

%LINEPROTO-5-UPDOWN: Line protocol on Interface Vlan10, changed state to up

%LINEPROTO-5-UPDOWN: Line protocol on Interface Vlan20, changed state to up

%LINEPROTO-5-UPDOWN: Line protocol on Interface Vlan30, changed state to up

%LINEPROTO-5-UPDOWN: Line protocol on Interface Vlan40, changed state to up

RT01-VA(config-if)#^Z
RT01-VA#
%SYS-5-CONFIG_I: Configured from console by console

RT01-VA#wri
Building configuration...
[OK]
RT01-VA#sh ip inter
RT01-VA#sh ip interface b
Interface              IP-Address      OK? Method Status                Protocol 
GigabitEthernet0/0     unassigned      YES unset  administratively down down 
GigabitEthernet0/1     unassigned      YES unset  administratively down down 
GigabitEthernet0/2     unassigned      YES unset  administratively down down 
FastEthernet0/0/0      unassigned      YES unset  up                    up 
FastEthernet0/0/1      unassigned      YES unset  up                    down 
FastEthernet0/0/2      unassigned      YES unset  up                    down 
FastEthernet0/0/3      unassigned      YES unset  up                    down 
Vlan1                  unassigned      YES unset  administratively down down 
Vlan10                 10.16.0.1       YES manual up                    up 
Vlan20                 10.16.2.1       YES manual up                    up 
Vlan30                 10.16.4.1       YES manual up                    up 
Vlan40                 10.16.6.1       YES manual up                    up
RT01-VA#

Sólo dejaremos pasar las VLANs 1, 10, 20:

RT01-VA(config)#interface fastEthernet 0/0/0
RT01-VA(config-if)#switchport trunk allowed vlan 1,10,20

RT01-VA(config-if)#do sh inter trunk
Port        Mode         Encapsulation  Status        Native vlan
Fa0/0/0     on           802.1q         trunking      1

Port        Vlans allowed on trunk
Fa0/0/0     1,10,20

Port        Vlans allowed and active in management domain
Fa0/0/0     1,10,20

Port        Vlans in spanning tree forwarding state and not pruned
Fa0/0/0     20

Configurar las interfaces fa0/3 y fa0/4 en modo access, vlan 10 (PC1) y vlan 20 (PC2) respectivamente:

Access(config)#interface fastEthernet 0/3
Access(config-if)#switchport mode access 
Access(config-if)#switchport access vlan 10
Access(config-if)#exit
Access(config)#interface fastEthernet 0/4
Access(config-if)#switchport mode access 
Access(config-if)#switchport access vlan 20
Access(config-if)#^Z
Access#
%SYS-5-CONFIG_I: Configured from console by console

Access#wri
Building configuration...
[OK]
Access#

Comprobamos la comunicación entre PC1 y PC2


Asignar direcionamiento IP Metropolitan Area Network (MAN), subred 172.16.0.0/28:


RT02-BCN#conf t
Enter configuration commands, one per line.  End with CNTL/Z.
RT02-BCN(config)#interface gigabitEthernet 0/0
RT02-BCN(config-if)#ip address 172.16.0.6 255.255.255.240
RT02-BCN(config-if)#no shut

RT02-BCN(config-if)#
%LINK-5-CHANGED: Interface GigabitEthernet0/0, changed state to up

%LINEPROTO-5-UPDOWN: Line protocol on Interface GigabitEthernet0/0, changed state to up

RT01-VA#conf t
Enter configuration commands, one per line.  End with CNTL/Z.
RT01-VA(config)#interface gigabitEthernet 0/0
RT01-VA(config-if)#ip address 172.16.0.5 255.255.255.240
RT01-VA(config-if)#no shut

RT01-VA(config-if)#
%LINK-5-CHANGED: Interface GigabitEthernet0/0, changed state to up

%LINEPROTO-5-UPDOWN: Line protocol on Interface GigabitEthernet0/0, changed state to up

RT01-VA(config-if)#

TR03-ZA#conf t
Enter configuration commands, one per line.  End with CNTL/Z.
TR03-ZA(config)#inter
TR03-ZA(config)#interface g
TR03-ZA(config)#interface gigabitEthernet 0/0
TR03-ZA(config-if)#ip add
TR03-ZA(config-if)#ip address 172.16.0.7 255.255.255.240
TR03-ZA(config-if)#no shut

TR03-ZA(config-if)#
%LINK-5-CHANGED: Interface GigabitEthernet0/0, changed state to up

%LINEPROTO-5-UPDOWN: Line protocol on Interface GigabitEthernet0/0, changed state to up

Hacer ping para comprobar conectividad entre los Routers:

TR03-ZA#ping 172.16.0.6

Type escape sequence to abort.
Sending 5, 100-byte ICMP Echos to 172.16.0.6, timeout is 2 seconds:
.!!!!
Success rate is 80 percent (4/5), round-trip min/avg/max = 0/1/2 ms

TR03-ZA#ping 172.16.0.6

Type escape sequence to abort.
Sending 5, 100-byte ICMP Echos to 172.16.0.6, timeout is 2 seconds:
!!!!!
Success rate is 100 percent (5/5), round-trip min/avg/max = 0/0/1 ms

TR03-ZA#ping 172.16.0.5

Type escape sequence to abort.
Sending 5, 100-byte ICMP Echos to 172.16.0.5, timeout is 2 seconds:
!!!!!
Success rate is 100 percent (5/5), round-trip min/avg/max = 0/0/1 ms

Cisco es genial!.